


Nowadays, there are a bunch of Mac cleaner applications that you can find in the market and a lot of Mac users would ask which of those Mac cleaners are the best to use and efficient. Though you also have to keep in mind that you should not always be calm about viruses and adware on your Mac.
This is because once that you have downloaded a certain application from an unknown website or anywhere outside the App Store, there is a high possibility that you can get viruses on your Mac such as Trojan or adware. And there are certain Mac cleaner applications as well that will not be able to give you a quick update once that you get a new macOS is out.
That is why it has been said that if you would want to free up space on your Mac’s disk, then you should be using the Dr. Cleaner as it is said to be one of the best Mac Memory and Disk Space Cleaner that you can get from the Apple App Store. So let us go ahead and take a closer look at this Mac application.
TIPS:
Contents: Part 1. Dr. Cleaner Review: What Is It?Part 2. A Guideline of Dr. CleanerPart 3. More Tools That You Can UsePart 4. Conclusion
Part 1. Dr. Cleaner Review: What Is It?
Dr. Cleaner is one Mac application that offers all its users to have a better optimization when it comes to their Mac’s memory space, disk cleaning, and monitoring the performance of their Mac. This program is made for cleaning up all the unwanted files in a Mac.
The latest Dr. Cleaner actually comes with several features which include the following.
- Junk Files Cleaner
- Big Files Scanner
- Duplicate Finder
- Intelligent App Manager
- File Shredder
Part 2. A Guideline of Dr. Cleaner
For all of you to have a better picture of the Dr. Cleaner, we are going to run you through its aspects. We are going to present to you the Dr. Cleaner in four aspects.
1. Menu Window
The Dr. Cleaner clearly has an attractive design when it comes to its interface. In the menu window, it is where you will be able to see your Mac’s CPU usage, network, and your Mac’s memory. You can also see from that page the size of the junk files that you have on your Mac. And there are also options that you can find under the menu window.
- Memory Optimizer – Once that you have installed the Dr. Cleaner on your Mac, it will then be able to automatically calculate the display memory usage and then be able to free up your memory in just a matter of seconds.
- Junk Cleaner – Dr. Cleaner will be able to delete all the junk files that you have on your Mac as well. All you need to do is to click on the Clean button and the program will then delete all the junks that you have on your Mac.
- CPU Usage Monitor – Using this feature of the Dr. Cleaner, you will be able to see your usage of your CPU. It will give you details on how long your Mac’s battery will last and at the same time, it will tell you how much CPU usage have you been accumulating.
- Network Usage Monitor – If you actually have a data plan with both unlimited and limited amount, then this feature will be able to show you how much data have you been using and how much data is left. This feature will also give you information which includes the quality of your Wi-Fi signal.
2. Main Console
Aside from the Menu Window, the main console is also considered to be one of the most important aspects of Dr. Cleaner. This aspect has actually six features.
- Junk Files – The Dr. Cleaner has the ability to remove all of the junk files that you have on your Mac.
- Big Files – Every Mac actually carries big files in it that are occupying a lot of space on your Mac. That is why the Dr. Cleaner has this feature for you to be able to remove all of the big files that you no longer use on your Mac. This way, you will be able to gain more of your storage space again.
- Disk Map – this feature will allow every Mac user to manage all the files that they have on their hard disk. It will scan your hard drive and can give you a visualization of the files and folders on your Mac. So with that, you will be able to see the files that you no longer need. It will also give you the information as to when was the file was made.
- Duplicate Files – Another very common situation that we do on our Mac is when we tend to accidentally download or save multiple files having just one content. And clearly, these multiple files that we have is eating up a huge space on your Mac. That is why using this feature will allow you to find all the duplicate files that you have on your Mac and remove them to free up space.
- App Manager – This feature is similar to the uninstaller. There are clearly some apps that you have on your Mac that you no longer need. So for you to be able to uninstall these apps, all you need to access is the App Manager of the Dr. Cleaner. This will help you to uninstall and as well as to delete all the files that are associated with that application that you want to delete.
- File Shredder – This feature will allow you to shred or overwrite the content of a certain file using this feature. It will allow you to remove any files from your Mac and without having to worry about someone that might recover it.
3. Preferences
This aspect is considered to be the soul of the Dr. Cleaner program. In here, you will be able to see “General”, "Notification”, “Memory”, “Whitelist”, and “Auto Select”.
- General – here you will be able to auto start at login and some other options depending on what you prefer.
- Notifications – here you can disable the notification about the smart memory optimization.
- Memory – this is an artificial intelligence that will allow you to set up an automatic cleaning once that you have low memory on your Mac.
4. Technical Support
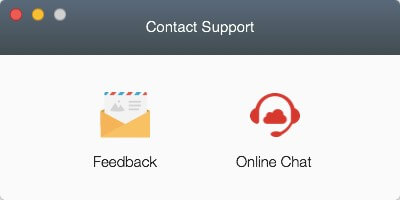
This is where you will be able to contact any support from the Dr. Cleaner. Here you can choose from two ways on how you would want to contact them for support. One is by sending them an email, and the other one is by chatting with a representative to help you.
Part 3. More Tools That You Can Use
Aside from all the features that were mentioned above, there are some other tools that you will be able to find handy that was made by the Dr. Cleaner.
- Dr. Battery – this is one tool that you can use for you to be able to monitor the battery usage of your Mac. This will also give you information such as its current charging level, battery capacity, power usage, the number of times that it has been charged, and more. It can also extend the life of your battery for you to be able to use your Mac longer.
- Dr. Antivirus – this tool will allow you to prevent your Mac from having a virus.
- Dr. Unarchiver – this tool can be used for you to be able to decompress your files. However, this tool is somewhat different from the other decompression tools. It is because it does not only support all kinds of formats but at the same time, it can check the procedure before you can go ahead and extract a file.
Having this Dr.Cleaner will require you to have a macOS 10.10 or later version. And also, it is compatible to install on a macOS High Sierra version. It can also support many languages such as German, Spanish, English, French, Korean, Italian, Traditional Chinese and more.
Part 4. Conclusion
So there you have it! You have now known more details and facts about the Dr. Cleaner. There is another Mac Cleaner software, iMyMac PowerMyMac, which is better than Dr. Cleaner. Now it is up to you if you are going to get this program for your Mac.
 Get A Free Trial Now!
