


Every Mac in the world is also prone to dealing with some common problem, and that is the problem with your disk space. Because of this, there are also some that are experiencing getting a message saying that they have a full startup disk.
And with the high disk usage that most Mac users are facing, people had already built a lot of software that is intended in cleaning up your disk space. And we are also going to show you one of the best software there is.
But before we go ahead and start with the cleaning process, one of the most important things that you should know is how to know the usage of your disk space and also look for the data that is taking up most of your disk space.
Contents: Part 1. What Is Disk Usage?Part 2. How to Check Disk Usage on MacPart 3. The Best Way to Manage High Disk Usage on MacPart 4. How to Decrease the High Disk Usage on MacPart 5. Conclusion
Part 1. What Is Disk Usage?
What is disk usage? Is high disk usage bad? Disk usage indicates the available free space or the used space that all of your files had consumed on a single drive. And once that you have a little amount of space left on your hard disk, then your Mac will then act up slow and have a bad performance.
This is the reason as to why you should also be monitoring your disk usage to avoid some more problems that you might encounter on your Mac like 'High Disk Usage'.

What Is Disk Space
Now on the other hand, when we say Disk Space, this refers to the certain capacity of your drive that is indicated with the total amount of space showed in bytes. The total number of bytes that it contains is also the total number of bytes that it can carry out through files and other data.
So once that you have disk space that has an 800 GB storage space available, that also means that this disk can hold up files to 800 GB and will not be able to hold bigger than it.
That is to say, you may need to free up some space once it's highly used.
Part 2. How to Check Disk Usage on Mac
Now, before reducing the high disk usage, you should check out the Disk Usage of your Mac first. Follow the steps below to do it on your own.
- On your Mac, go ahead and go to your Apple Menu.
- Click on the Apple icon.
- Then go ahead and choose “About This Mac”.
- Click on the Storage tab.
From there, you will be able to see the total number of storage of your hard drive. And commonly, you will also see different categories of files on your disk usage graphically such as the following.
- System Junk
- iOS Fies
- Applications
- Documents
- System
- iTunes Files
- Purgeable Files
- Other user’s file
- Other
Now, the category “Other” is where it contains some of your personal information, your images on your disk, your temporary files, your system caches, Library folder that is customized, your archives, and some other files that are not detected by your Spotlight application on your Mac.
And on the same page on your screen, you will also be able to find the available space left in your hard disk. This is located above the graphics figure just below the name of your Mac.
Part 3. The Best Way to Manage High Disk Usage on Mac
Now, aside from the fact that we are able to know more about your high disk usage or hints of "Your startup disk is almost full" on your Mac. There is the best way for you to be able to lessen this high disk usage that you have on your Mac, and that is by cleaning up all of the useless and unwanted files that you have.
You can actually do this manually as what we have mentioned earlier, but for you to be able to save more of your time, then the iMyMac PowerMyMac is the answer.
PowerMyMac is the best Mac cleaner that you can have for cleaning up your Mac as it is fast and very effective. It can remove any files and apps that you no longer need on your Mac with just a hint of a button.
All you need to do is to have the PowerMyMac installed on your Mac and you are ready to go and clean up your Mac starting off with your System Junk:
Step 1. Check Disk Status with the PowerMyMac
Launch the program. The program shows you the system status of your Mac wherein you can find your CPU status, Memory status, and even your Disk status.
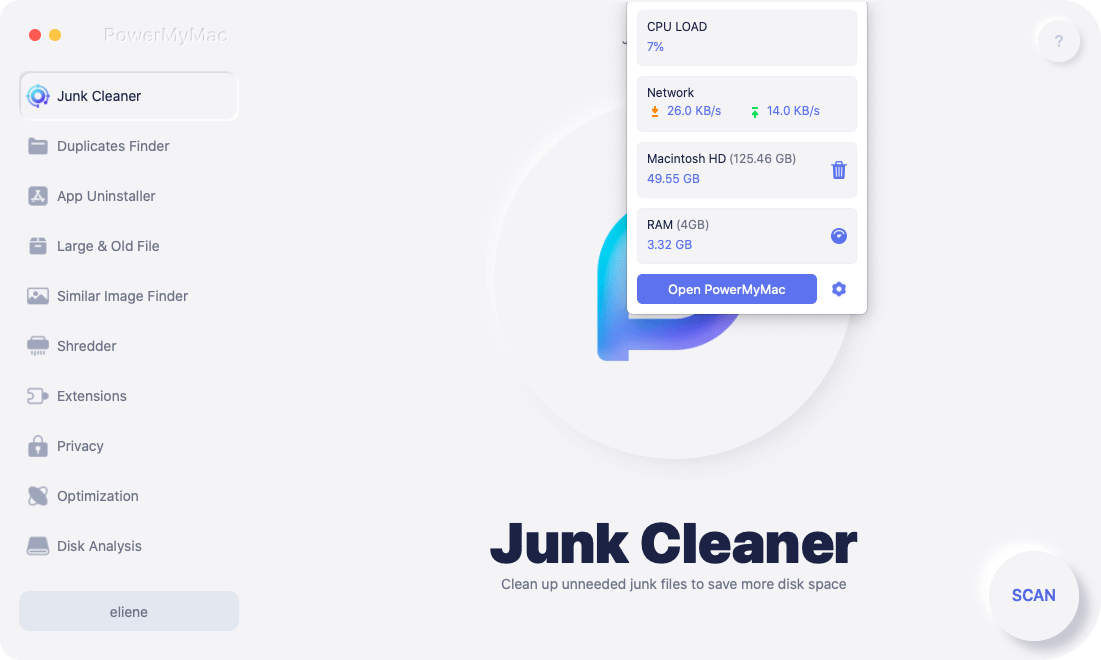
Step 2. Select Junk Cleaner Module
You will see a list of options and from there, go ahead and click the Junk Cleaner.
Step 3. Detect All System Junk on Mac
After that, simply click on the “SCAN” button so that the iMyMac PowerMyMac will be able to detect all of the system junk that you have. Wait until the process is over and done.
Step 4. See the Result
Once that the scanning process is completely done, you can go ahead and then and see the result.
Step 5. Select All Files to Delete
Then on the result page, there is a set of categories that you can find on the left side of your screen. From that list of files, go ahead and choose all the ones that you wish to remove from your Mac.
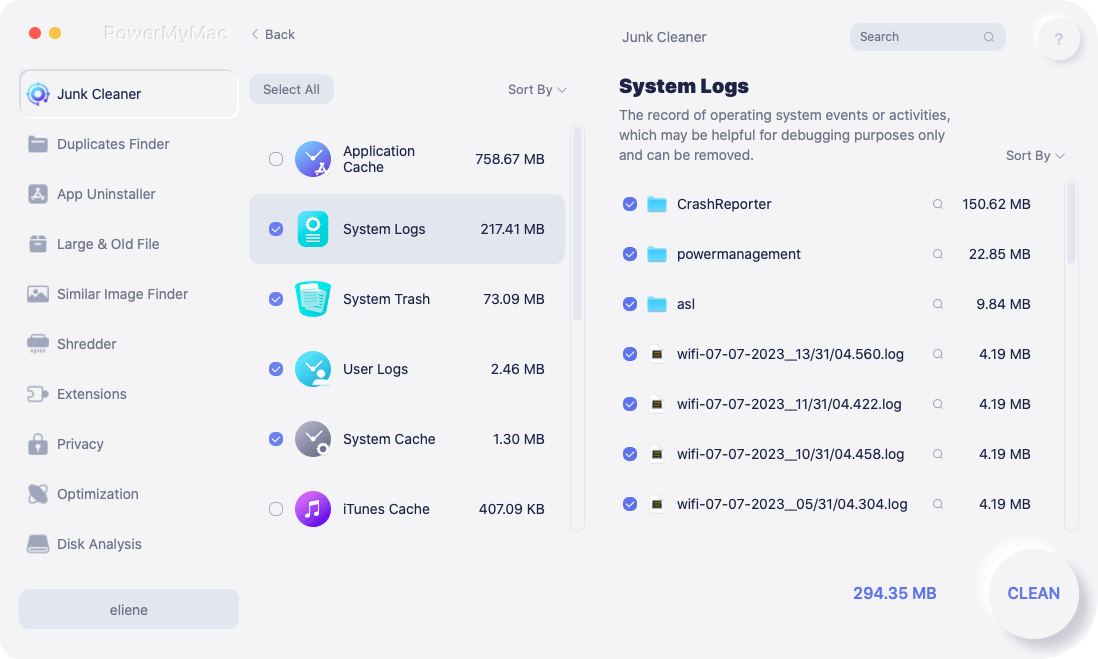
Step 6. Clean Up Your System Junk
Click the CLEAN button below your screen and the cleaning process will now start. Wait for the PowerMyMac to finish the cleaning process.
Part 4. How to Decrease the High Disk Usage on Mac
Now, since you were able to know details of the data that is taking up your disk space, then it a must for you to clean up your Mac especially if your disk usage is high. And with that, you will be needing to remove all of the files that you no longer need which is considered to be useless on your Mac.
And with that, here are some of the ways on how you can lessen up your high disk usage on your Mac.
1. Clear Out Your Trash
The files or other junks that you put in your Trash does not imply that you have already freed up space on your hard disk. Those files that you put in your Trash are still there and still occupying space.
Now, in order for you to really clear out space, then you should empty out your Trash. But you have to remember, once that you delete files or other data on your Trash, you will no longer have them recovered. So make sure that all the files that it contains are no longer needed.
2. Remove Your Downloads
The thing is, once that you have downloaded a single file over the internet, it will be saved directly on your Download folder. So why don’t you try to open up that folder and make sure to remove all of those downloads that you no longer need for you to free up space on your hard disk?
3. Clean Up Your App Caches
Caches are known to be temporary files that are gained from the applications and even from your browser and other programs that you have on your Mac. These caches are actually helpful in fixing high disk usage and making your Mac perform faster.
However, the time will come that you will not be needing them anymore. So, if you think that you no longer needed these app caches that you have on your Mac, just go ahead and go to ~/Library/Cache and have them removed completely from your Mac.
4. Clean Up Your Logs
If you try to open and use your Library folder, you will also be able to notice another file that is temporary on your Mac which is called your Log files. They are located under your Logs folder and are eating up space on your Mac as well.
Now, in order for you to free up space, just go ahead and simply clean up your Logs. But, you have to make sure that those logs are not needed anymore before you delete them on your Mac.
5. Take Out Your Old iPhone Backups
Many Apple users would actually try to sync their iPhone device to their iTunes which is also a great way for them to back up their data. However, every time you sync your device, it actually just makes more and more copies of your backup file resulting to piling them up on your Mac.
So, for you to lessen your high disk usage, go ahead and access your old iPhone backups and remove them from your Mac.
6. Remove Your Mail Downloads
Once that you try to view specific email attachments using the Mail application on your Mac, it is automatically be saved on another folder. Wherein in a few more months, you will be surprised to see that particular folder has a huge number of gigabytes taking up your Mac.
So for you to prevent this to happen, you can actually have the preview of the files and then have them save if you need them to. Another way is that you can just simply remove them all from your Mac. And for you to find all of your Mail Download, just go ahead and use this path: ~/Library/Container/com.apple.mail/Data/Library/Mail
7. Uninstall Useless Applications
If you have some applications on your Mac that you actually do not need, then remove them. That will help your Mac to have more disk space. But you have to remember that dragging the app icon to your Trash will not make it completely deleted.
There is still some file residue that you need to remove from your Mac which comes with the application that you are going to uninstall. So you have to go through your Mac and look for all the reside files of the app that uninstalled.
8. Delete Your Duplicate Files
There are instances that we make two or more copies of a single document or have downloaded them multiple times accidentally. And because of that, you should be considering on removing all of your duplicate files on your Mac for you to fix high disk usage.
Tip: Download iMyMac PowerMyMac- Use its Duplicates Finder to free up your space.
Tip: If you have a Windows computer and are suffering a 100% Disk Usage in Windows, you can turn to this post on Makeuseof to resolve the issue.
Part 5. Conclusion
Having a high disk usage on Mac is actually a very risky thing to have. This is because it can harm your Mac device. And not only that, you won’t be able to save more files as well and your Mac will also start to run slow.
So if you would not want this to happen to your Mac, you should be mindful of your disk usage and start cleaning up your Mac with the iMyMac PowerMyMac once that you see you are having a high disk usage.

