


Need to uninstall Movavi on Mac? Movavi is a non-linear video editing program and aimed largely at non-technical consumers. On Windows and Mac OS, the program may be used to generate movies and slideshows from many short clips or photographs.
First of all, Movavi is a great app. There’s no doubt about that but also it has its own flaws. Movavi has a slow rendering time on heavy video files. Movavi also only provides basic editing control as well as some basic color settings which is a huge deal-breaker for some users. Its free trial has so many constraints like limited features, cut time on video clips, and a watermark that ruins the experience.
That being said, for whatever reason that you have, here's how to uninstall Movavi on Mac. We’ll also give you guidelines to avoid losing much-important files such as movie projects. After that, we’ll give the top ways to uninstall unwanted apps on your Mac easily.
Article GuidePart 1. How Do I Uninstall Movavi on Mac?Part 2. Movavi Won’t Uninstall? Use PowerMyMac NowPart 3. Conclusion
Part 1. How Do I Uninstall Movavi on Mac?
When you don't need Movavi anymore, you might want to uninstall it. As you would expect, deleting programs on a Mac is not simple. Unfortunately, dragging and dropping it into the Trash isn't enough. Manually uninstalling any application is a time-consuming procedure that wastes your time and patience. To uninstall Movavi on your mac, just follow these steps below:

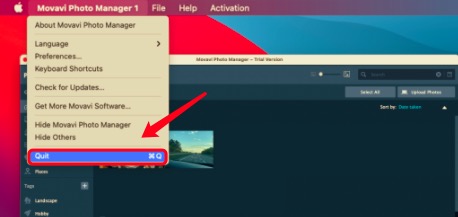
- To begin, close the program you wish to remove. This may be done by hitting the
COMMAND+Qshortcut or selecting the Movavi Photo Manager tab in the menu at the top of your screen. - Keep an eye out if Movavi is still running in the background. The Activity Monitor, which can be found in the Utilities folder in Launchpad, does this. Check all the processes associated with Movavi from the list that appears. If any Movavi related app is still running, end them by hitting the "X" sign at the top of the program window, then click the Quit Process symbol in the window's left corner and select Quit from the pop-up dialog box. If it doesn't work, try hitting Force Quit.
- In Finder, open the Applications folder type its name into the search bar, right-click on it, and select Move to Trash. You can also complete this by dragging the Movavi icon into the Trash icon.
Now you have successfully removed Movavi from your Mac but its remnant files remain on your computer and take up some memory space. Now, this is where things start to get tricky. You must look for all logs, service files, caches, and other various stuff.
This data helps the app on keeping things running smoothly but now that you are going to uninstall Movavi on mac, these data are useless. The support files for most apps are stored in your computer's Library or ~/Library folder. You must go there and clear out the leftovers.
- Open up your Finder and type Movavi on the search bar to look for its leftovers. You can go into the secret library folder by pressing
Command+Shift+G. These folders are normally hidden so that users don't remove them by accident, as deleting some of these files might create problems with your computer. - Search through these subfolder directories for folders with Movavi's name on it. Here are a few places where you could find these remaining files:
~/Library/Application Support~/Library/Saved Application State~/Library/Logs~/Library/Containers~/Library/Application Scripts

- We can now empty the Trash by right-clicking on its icon and selecting "Empty". Make sure you've restored any data you don't want to be permanently destroyed before you empty your Trash.
Deleting a program from a Mac may be simple and difficult at the same time. Simple because the user only needs to drag the undesirable application to the Trash; tough in terms of not only the need to manually find the leftover data can be problematic but mistakingly deleting the wrong file can make your computer have some problems.
Part 2. Movavi Won’t Uninstall? Use PowerMyMac Now
Now that we've gotten through the tedious manual method, let's move on to a more practical and easy one. You can uninstall Movavi on Mac automatically, which is the most convenient option.
Here's where the PowerMyMac tool developed by iMyMac will be handy. This tool enables users to optimize their Mac computers. PowerMyMac is a user-friendly application that simplifies the process. In only a few clicks, it can remove any application as well as any software remnants from your computer.
The instructions for uninstalling it are as follows.
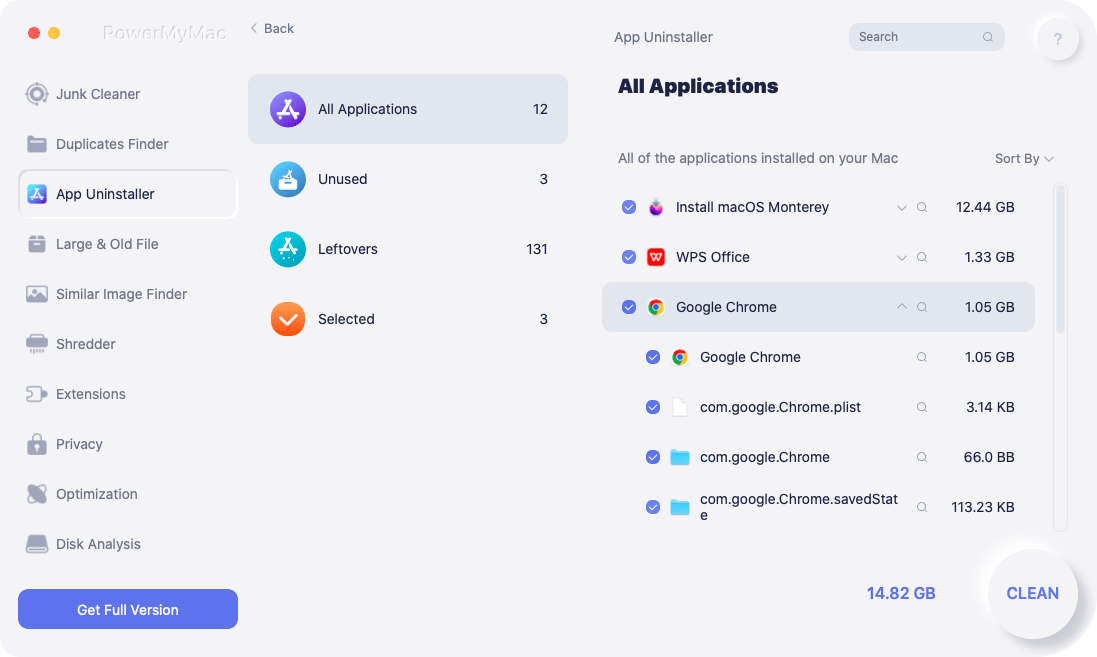
- Start PowerMyMac. Hit the Scan button from the Uninstaller Module and the program will scan your application folder and show you all of the apps installed on your Mac.
- From the drop-down menu, choose Movavi. On the right side, you'll see a list of files associated with the program.
- To remove Movavi mac and all of its related files, click the Clean button and wait till PowerMyMac confirms that the process is complete.
- The message "Cleanup Completed" will appear. Movavi and its remaining files are no longer on your computer. Isn't it simple?
Part 3. Conclusion
After reading this, tell us which method you believe is more easy and reliable to uninstall Movavi on mac. Manually removing Movavi is not only difficult, but it may also be dangerous if you are unfamiliar with the procedure. It's quite simple to mistakenly wipe vital data on your Mac computer.
From our perspective, it is quicker to utilize PowerMyMac than to search the hidden Library for all the leftovers. The greatest part is that PowerMyMac ensures that no additional service files are left to take up precious space on your computer. It also optimizes your Mac by deleting redundant files and secures your machine. You can download the tool right now from the iMyMac website and try it out!


ROSILENE WAGNER MIRANDA2022-11-19 14:22:49
Instalei por engano preciso desinstalar.