


Some sites can be accessed by certain regions or countries only. At other times, our IP addresses may be tracked. As such, we use virtual private networks. This allows us to access restricted sites or even mask our online activity. One such tool is VPN Shield. Of course, it comes with flaws too. That’s why you may want to learn how to uninstall VPN Shield on Mac.
VPN Shield was made to create a virtual private network service that’s not difficult to set up. They offer different subscription plans for customers. A single VPN Shield account can be used within five different devices, which makes it handy.
If you don’t want to use an app anymore, then you may want to remove the app from your Mac computer. As such, we’re here to help you uninstall the tool on macOS. Our guide will talk about manual and automatic uninstallation methods to help you get rid of the tool.
Article GuidePart 1. How Do I Uninstall VPN Shield from Mac?Part 2. Completely and Automatically Uninstall VPN ShieldPart 3. Conclusion
Part 1. How Do I Uninstall VPN Shield from Mac?
Like other applications out there, removing them on Mac will be a tedious process. That’s because macOS typically don’t have built-in uninstallers within them. As such, you have to remove the app itself. After that, you have to locate all the service files, logs, caches, temporary files, and other associated data of VPN Shield.

So, below, check out the steps on how to manually uninstall VPN Shield on Mac:
- Exit VPN Shield and all of its associated processes. Double-check that this is the case through the Mac’s Activity Monitor, which can be found in the Utilities
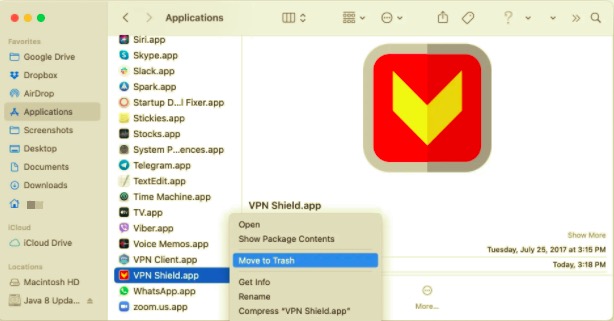
- Now, visit your Mac’s Applications Within that folder, locate the VPN Shield app. Typically, this has the extension APP at the end of it. Move this app towards your Mac’s Trash.
Now, you may think this is the whole process. But, actually, you still have to locate leftover data. To do this, follow the steps below:
- Visit the Library folder of your Mac. To be able to do that, open your Mac’s Finder. Within that Finder, press the keys
CMD + SHFT + G. - A window will be shown after you press the three keys. On the search bar, type the following without the dot at the end:
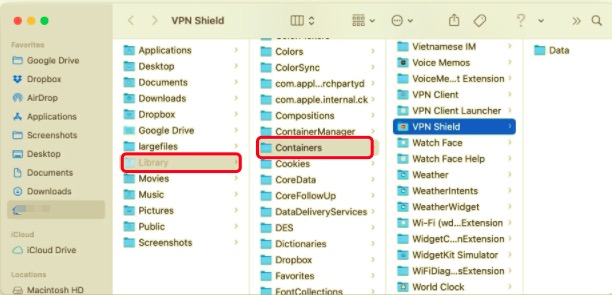
~/Library. Once that is typed in, press the GO button. - You will now be taken to the Library folder of your Mac. Now, you have to locate all files and folders related to VPN Shield. There are both FILES and FOLDERS you have to delete. To do that, simply check the subfolders below (which you can find in the main library folder):
/Application Scripts/Containers/
- Once you locate related files and folders, move them towards your Mac’s Trash.
- Now, find an app on the Internet (using Google). Look for an app that will show the hidden files of your Mac computer.
- Once you use this app, type in “VPN Shield” in its search bar. If there are remaining files and folders related to VPN Shield, delete them.
- Once that is finished, you can simply empty your Mac’s Trash.
- Finally, reboot your Mac computer to finish the process on how to uninstall VPN Shield on Mac.
As you can see, the manual method of removing apps such as VPN Shield from your Mac is very cumbersome. You have to go through a lot of steps, use different tools, and even grab tools online you don’t even know.
As such, this can also be dangerous. You may mistakenly delete system files and folders. Or, you may download tools that are not reliable and has malware. That’s why we recommend that you choose the next method of uninstalling or removing VPN Shield.
Part 2. Completely and Automatically Uninstall VPN Shield
This section will teach you a faster and SAFER way to uninstall VPN Shield on Mac. You have to use a virus-free and reliable tool for uninstalling macOS applications. As such, you have to be careful in choosing the tool you will use.
That’s why we recommend only the best – iMyMac’s PowerMyMac tool. This is an optimization tool for macOS computers. It helps you clean out junk files, remove temporary files, and secure your Internet privacy.
To do all these things, it has to use different tools within it. One such tool we need right now is the Uninstaller utility of PowerMyMac. It can be used to remove apps and their leftover data without having to dig through a lot of stuff.Here are the steps to use it:
- Grab Tool Online. First, you have to visit iMyMac.com and click PowerMyMac at the top menu. From the new page, download the version that you want.
- Install Tool. Once you have downloaded the installer, simply use it to install the tool so you can use it later.
- Open Tool. Once installed, you can simply double-click the app’s icon to open PowerMyMac. The performance monitor will show up on the homepage.
- Click Uninstaller. Look at the modules and utilities on the left. Click the module labeled Uninstaller.
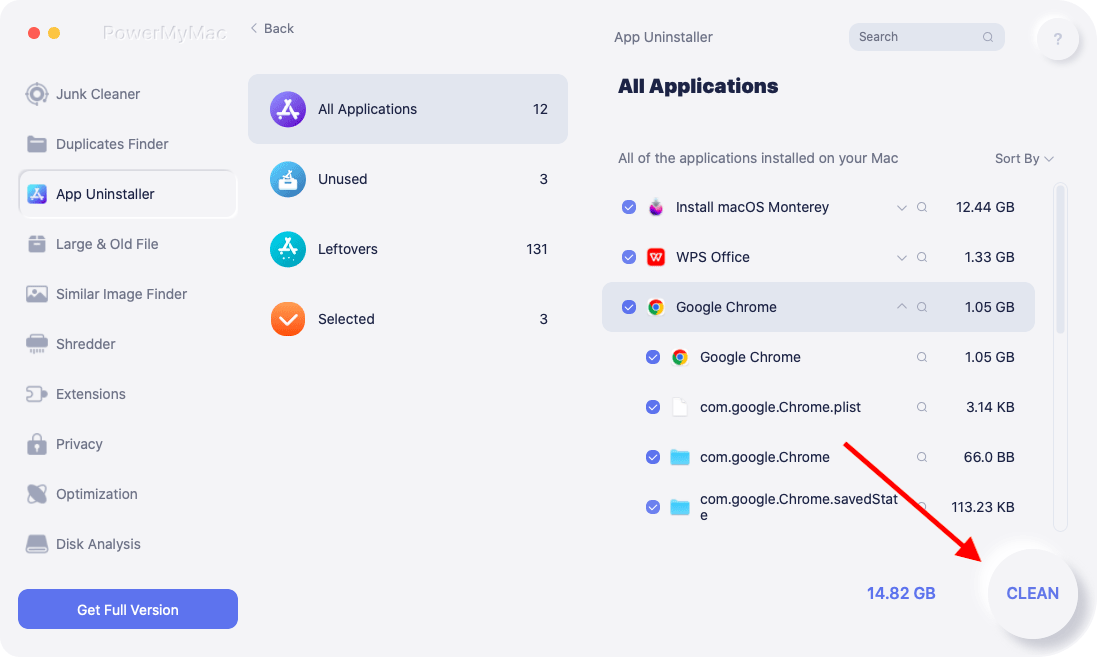
- Scan For Apps. Click the Scan button at the central portion of the interface (bottom center) and wait for the app to finish scanning the entire system. From the list that will be shown, select VPN Shield. Make sure you select all its files and folders too.
- Now, to uninstall the tool, click the Clean button. This will take a few seconds to a few minutes. Once that is done, PowerMyMac will give you a confirmation.
Part 3. Conclusion
Again, we have given you two different ways to uninstall VPN Shield on Mac. The introduction talked a little about VPNs and the VPN Shield tool itself. In the middle, we talked about the manual method of removing the app. Finally, we gave the best optimization tool, PowerMyMac, to help you uninstall apps such as VPN shield from your Mac computer. Plus, you can use mini tools within it to make your computer run faster!

