


While browsing sites through your PC or just by using it, you have probably encountered interesting audio that you wish you could keep with you to listen to later on. Perhaps, you might have been in a situation as well when recording your microphone is necessary, and yet, you have no idea how you can ace the process. Fortunately, there are methods of how to record desktop audio with Audacity that one can easily follow and use. Choosing tools like “Voice Memos” or “Sound Recorder” could be good enough but relying on options like Audacity can offer much more benefits since advanced editing and audio recording can be done through it.
Given that Audacity is an open-source program that’s also free to use, this can be considered a good go-to solution when it comes to desktop audio recording. Though some find it challenging to use due to its interface, there is no harm in trying!
Contents: Part 1. Does Audacity Record Desktop Audio?Part 2. Best Alternative When Audacity Not Recording Desktop AudioPart 3. In Conclusion
Part 1. Does Audacity Record Desktop Audio?
Right away, you’ll be exposed to the tutorials on how to record desktop audio with Audacity in this section.
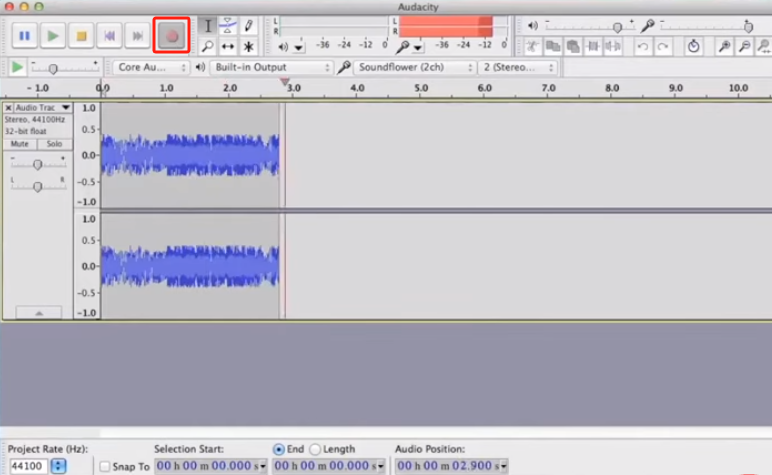
How to Record Desktop Audio with Audacity on Mac
While using your Mac, you have to install both Audacity and an additional plugin. The tutorial below uses “Soundflower” as the installed plugin. It’s free to use as well so don’t worry too much.
- Upon installing both apps, configure “Soundflower”. Tap “System Preferences”, and choose “Sounds”. The device for output sound must be set to “Soundflower (ch)”.
- Launch Audacity next. In the “Device” section, select “Soundflower (ch)”. Choose “Software playthrough” in the recording section. Make sure to click “OK” afterward.
- To start recording, let the audio play and tap the “Record” menu on Audacity.
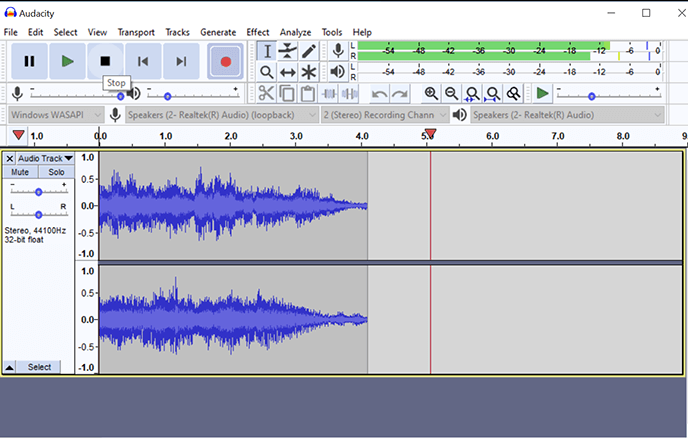
How to Record Computer Audio with Audacity on Windows
If you’re a Windows PC user, the below steps of how to record desktop audio with Audacity are what you have to follow.
- Upon launching Audacity, on Audio Host’s dropdown menu, select “Windows WASAPI”.
- Choose the system’s default headphones and speakers for the “Recording Device”. It might also be needed to tap the “Loopback” option. This could vary depending on one’s PC’s sound card.
- Create a new file and press the “Record” menu to begin the recording process.
How to Record Computer Audio with Audacity on Linux
Of course, we also have here the guide on how to record desktop audio with Audacity if someone is to use a Linux computer.
- Install “pavucontrol” first.
- Select “ALSA” as the audio host from the “Audio Setup” toolbar. “Pulse” must be chosen as the recording device.
- Tap “Start Monitoring” next.
- Launch “pavucontrol” or “PulseAudio Volume Control”. Select the “Recording” tab next.
- Go to the “Capture from”. From the dropdown menu, choose “Monitor”.
- Open the app with the audio that you’d like to record.
- In the “Recording tab”, the volume sliders must be dragged to set the recording level in the app’s recording meter to 0 dB.
- Lastly, tap the “Record” menu.
Part 2. Best Alternative When Audacity Not Recording Desktop Audio
It is good to know how to record desktop audio with Audacity as it is free to use though it could be a bit complicated for some other users. However, when this won’t function as expected, it would be great if there is an alternative that anyone can use. In this instance, using a professional tool such as the iMyMac Screen Recorder will always be the best option.
This program allows one to record high-quality audio files and even one’s screen activities or webcam if needed. A user can also customize the recording settings as per his preferences. Additionally, one does not need to worry about background noises that could disturb the results as these can be avoided. Most importantly, unlike other tools, this app has a simple interface. Beginners will surely love using it. Real-time annotation and other features are also available to use.
Let’s take a look at how desktop audio recording can be done using this app.
Get A Free Trial Now! Intel Mac M-Series Mac Get A Free Trial Now!
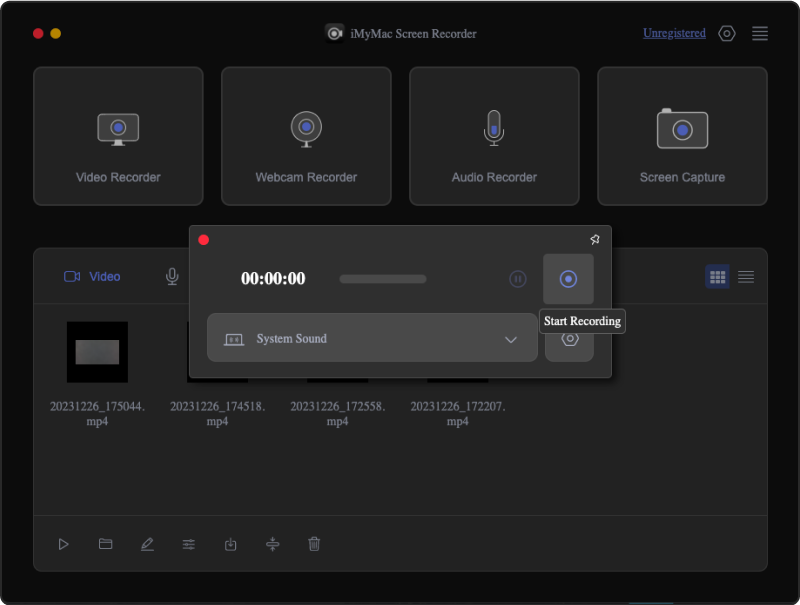
- Upon installing the app, open it and head to the main interface to choose the “Audio Recorder” menu.
- Capturing both the microphone and system sound is possible by choosing “System Sound & Microphone”. Alternatively, recording only one input source is possible by either choosing “System Sound” or “Microphone”. Setting up the audio settings gives one the ability to do the process as per his liking.
- Press the “Record” menu to commence recording.
- Once the recording is finished, just tap the “Stop” recording menu. Buttons to pause (in case one wishes to stop for a few minutes and then resume afterward) and restart (to discard the previous recording and begin anew) the recording process is also available and can be utilized as needed.
Editing functions are also available. Each user can take advantage of these features to get the best output files possible. If the screen recording function is to be used, there will be available menus to take screenshots and launch the webcam if needed.
