


Screen recording has been so helpful to many as this gives people the ability to keep copies of important calls, meetings, conferences, and the like for rewatching later on. Additionally, it is also a good method of creating tutorial guides or content for presentation. If you have been so fed up with the current screen recorders you’re using, you might want to learn how to do QuickTime screen recording with audio. It’s pretty easy. This post will be dealing more about this, just keep on reading if you’re interested in learning.
Contents: Part 1. How to Do QuickTime Screen Recording with Audio via Soundflower?Part 2. How to Record Screen with Audio in QuickTime on iPhone/iPad?Part 3. How Do I Record My Screen and Audio at the Same Time on Mac?Part 4. Conclusion
Part 1. How to Do QuickTime Screen Recording with Audio via Soundflower?
Have you heard about Soundflower before? It’s a plugin that can be used for free to create a virtual audio output when streaming a video on QuickTime to record your screen with audio. To begin QuickTime screen recording with audio, downloading this would be required.

Download Soundflower
- On your desired browser, go to the download page for Soundflower.
- Press the “Free download” button.
- At the bottom, you’ll see the Soundflower DMG file. Click it. You can also find it in your Mac’s downloads folder.
- Upon clicking it, the installer will open. Just follow the onscreen prompts to finish the installation.
- Restart your PC once done. Now, you should be all set to begin QuickTime screen recording with audio.
Start Setting Up Your QuickTime App
- Launch the “Finder” window and head to the “Applications” folder.
- Look for “Utilities” and click it.
- Double-click it to see “Audio MIDI Setup”.
- Press the “+” button at the bottom of the window.
- Choose “Create Multi-Output Device”.
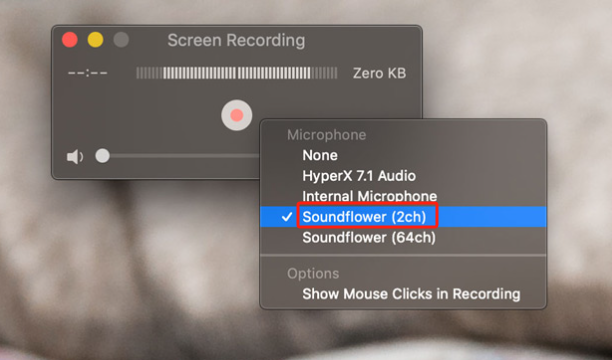
- A list showing audio devices will appear. Mark the box next to “Soundflower (2ch)”. You must also ensure that you have checked the box next to the “Built-in Output” menu.
- The “Built-in Output” menu under the “Drift Correction” section must also be checked.
- Tap the “Settings” menu. Select “Use this for Sound Output” afterward.
Start QuickTime Screen Recording with Audio
Upon completing the setup, now we can proceed with QuickTime screen recording with audio. The following steps are what must be completed.
- Launch your QuickTime Player. You can easily see this from the “Applications” folder on your Mac.
- Press the “File” menu and then choose “Open File” to launch the video that you wish to be recorded via QuickTime.
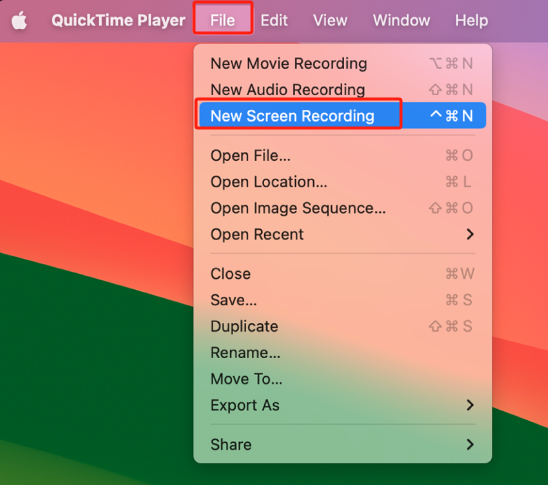
- Upon seeing the clip that you wish to record, press the “File” menu on QuickTime. Choose “New Screen Recording”.
- A menu shall appear at the bottom of the screen. From here, you can decide to record a portion of your screen, a selected window, or the whole screen.
- Press “Options” next and then select “Other location”. You can specify here where you want your recording to be saved.
- Tap “Record” next.
- While recording is ongoing, menus at the top of the screen will appear. Just press the “Stop” button whenever you’re finished.
- Upon ending, the recorded video shall open automatically.
Part 2. How to Record Screen with Audio in QuickTime on iPhone/iPad?
Now, let’s tackle how you can do QuickTime screen recording with audio using your iPad or iPhone.
- Connect your iOS device to your Mac.
- Open the QuickTime Player. Press “File”, then “New Movie Recording”.
- Next to the “Rec” button, you’ll see a dropdown menu. Click it. You have to select your iPhone or iPad for microphone and camera input.
- Click the “Rec” button to begin recording your screen activity.
- Once finished, press “Stop”.

You should remember that recording system sound from your Mac won’t be possible via this method.
Part 3. How Do I Record My Screen and Audio at the Same Time on Mac?
Even after learning how to do QuickTime screen recording with audio, if you’re still looking for a better way of recording your screen with audio, then you should no longer look any further. You can rely on professional software programs like the iMyMac Screen Recorder.
The abovementioned software app is capable of capturing one’s screen activities with a webcam and even audio. The users are flexible in choosing the type of sound to capture and even decide on the recording area. It is loaded with features that can be enjoyed by each user – editing menus, real-time annotation tools, buttons to restart and pause, and more. Of course, it’s easy to use since its interface is simple and intuitive. Apart from supporting macOS, it can also be used on Windows PCs.
Get A Free Trial Now! Normal Mac M-Series Mac Get A Free Trial Now!
Take a look at the below guide on how you can use the iMyMac Screen Recorder to screen record with audio on your Mac.
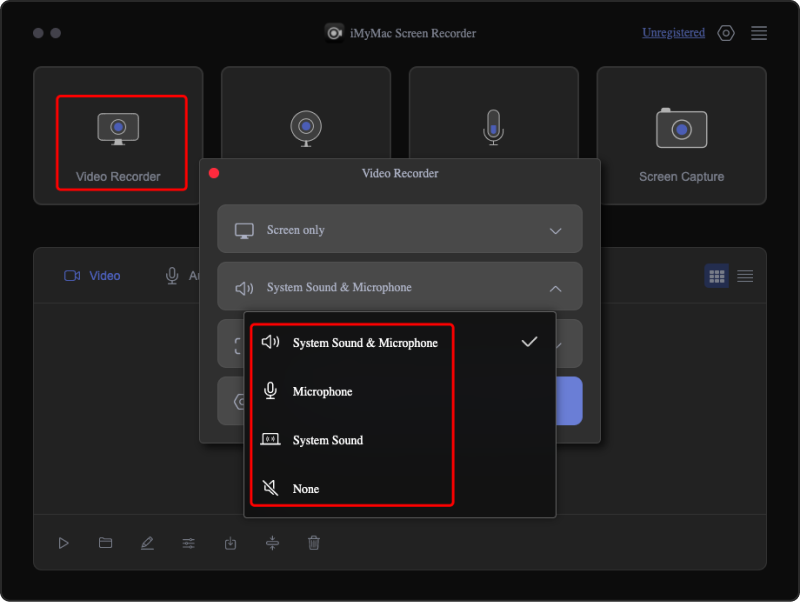
- Download and install the app before launching it. On the main interface, look for “Video Recorder” and tap it.
- Ensure that you have selected to capture the screen with audio. If you wish to record your webcam, you can do that as well. Choose the recording area next.
- Proceed to adjust the audio settings as you like. You can choose the type of sound to be captured.
- Press the “Start Recording” menu to begin recording. Once finished, just tap the “Stop” button to end. The editing menus and other functions can be utilized while recording is ongoing.
You should then see the output files saved to your Mac afterward.
Part 4. Conclusion
Doing QuickTime screen recording with audio with the help of Soundflower could seem complicated to some users due to the various details and steps that must be done. But this should still be good enough. If you’re looking for the best screen recording tool, keep in mind that apps like the iMyMac Screen Recorder would still be the most recommended to use.
