


If you are a YouTube geek then watching videos from YouTube is a part of your daily routine. But how about those people who make YouTube videos? Do they have some sort of uploading style? Do they upload MKV to YouTube?
If you want to learn more about what videos can be directly uploaded to YouTube, or what video converters you can use to make your videos better, feel free to read this article. Who knows, you might find your calling as a future ‘vlogger’ after reading this article.
Contents: Part 1. Can I Upload MKV File on YouTube?Part 2. Is It Better to Upload MP4 or MKV to YouTube?Part 3. How to Upload a Video to YouTube?Part 4. Conclusion
Part 1. Can I Upload MKV File on YouTube?
Read this section to learn more about MKV files before knowing how to upload MKV to YouTube.
YouTube does accept files in MKV format. However, because of the large size of MKV files, it can be a challenge to upload MKV to YouTube, not to mention that the speed of your internet can be a factor too.
So what is MKV anyway? MKV short for Matroska Video files are developed in Russia and are mostly used to store files. The MKV files were developed to fully be future-proof – which simply means that no matter how much time passes and no matter how many formats are developed as time goes by, MKV files will never get outdated.
Does YouTube Support MKV? If you are planning to upload videos on YouTube, it’s wise to learn what kind of files are accepted on their app. Luckily, MKV files are indeed accepted in YouTube as well as MP4 or H.264 scanning videos. So you can directly upload MKV to YouTube.
But if you are experiencing some problems when uploading MKV files to YouTube because of their large size, you can always convert it to a format accepted by YouTube.
Part 2. Is It Better to Upload MP4 or MKV to YouTube?
If you want to upload MKV to YouTube you can directly do so. But you should keep in mind that directly uploading MKV files to YouTube requires very long patience since it can be a long process due to MKV files’ large size.
However, there is also another way to successfully upload your MKV files. And that is through converting these MKV files to a format that is much smaller and accepted on the YouTube platform. And what can be a more versatile format than the MP4?
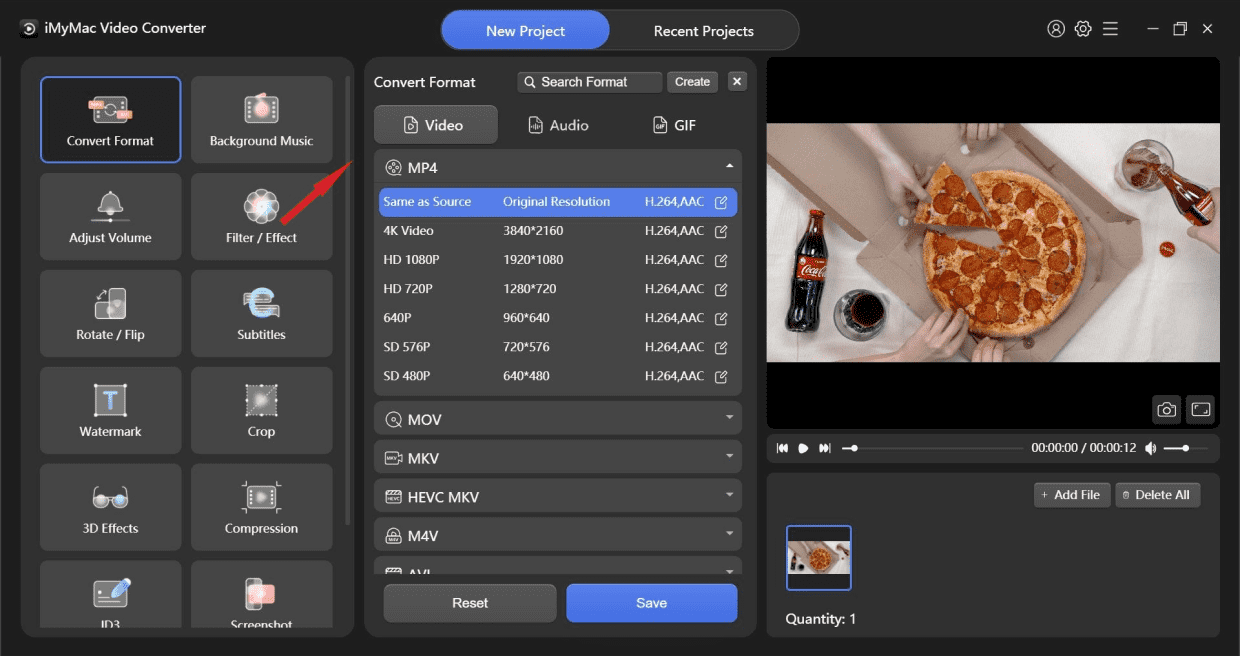
If you want to learn how to convert MKV to MP4, all you need to have is the right converting tool like the iMyMac Video Converter. It is a true beauty that can make converting much easier for you. It’s fast and reliable, not to mention that it also has many features.
For one, this tool can convert any form of media (video/audio) from one format to another. It can also let you edit your videos and watch them through their site for offline streaming.
This converting tool is also very easy to use and has a user-friendly interface. If you want to upload MKV to YouTube, learn how to use the iMyMac Video Converter by reading the procedures below to convert the MKV video to other formats:
- Install and launch the software on Mac or Windows, log in using your email and license code
- Upload or drag files to the software
- Adjust the settings including the output format and the output folder of your converted files
- Click Export and wait for it to finish
- Upload MKV to YouTube following the steps in Part 3
As simple as that, you can now upload MKV file by converting it to MP4 or other formats that are accepted in YouTube.
Tips: If you want a YouTube video downloader for Mac, click the link to know more.
Part 3. How to Upload a Video to YouTube?
Now that you have finally learned that you can upload MKV to YouTube or other video formats on YouTube and below is a simple step-by-step guide for you to start uploading videos on YouTube anytime you want:
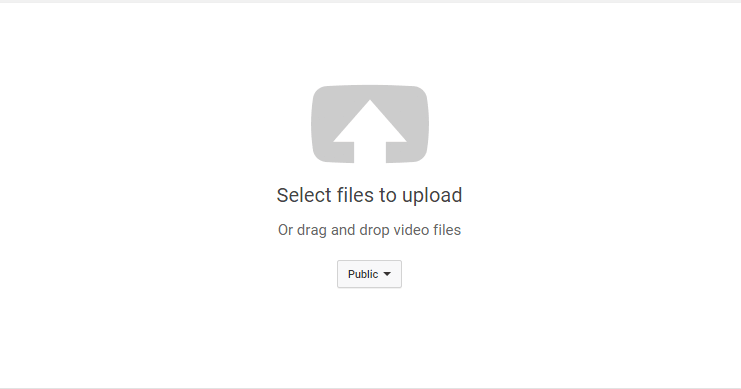
- Open the YouTubeapp and log in to your YouTube account
- At the top part of the YouTube homepage, click the Upload button
- Tap on Upload Video
- Click Select Files to select the video you want to upload
- After choosing the file, you can either double-click it or drag it to the YouTubeapp
- Once the file has been added it will take you to another page where you will get to set the settings for your youtube video like the Title, Description, and any tags you want
- Now, click the Privacy settings for your video
- Set a photo thumbnail for your youtube video to let your viewers see what’s in it for them
- Now, don’t forget to click the Save button
After reading the simple guides in Part2 and Part3, you can now easily upload MKV to YouTube!
Part 4. Conclusion
After knowing that you can upload MKV to YouTube and learning how to upload a video on YouTube, we’re sure that you can now start sharing your videos with your family and friends now. Also, don’t forget to use the iMyMac Video Converter if you want to convert your MKV files to other formats first so you won’t have a hard time uploading your videos.
This tool supports any format conversion so you can rest assured that it can convert MKV videos to other formats that are accepted in the YouTube app and edit them before you upload MKV to YouTube.
