


Is your Mac running out of space? In reality, getting your Mac empty is way harder than trying to fill it up with your applications and other files. All the files and applications that you have on your Mac is actually stored on your hard drive. So, before freeing up some of your data on Mac, you need to know how to check storage on Mac to see if you still have enough memory. And that is what we are going to show you here.
Article GuidePart 1. Why Checking the Storage on Your Mac is ImportantPart 2. Easy Ways on How to Check Storage on MacPart 3. How to Free up Your Storage on Mac?Part 4. In Conclusion
Part 1. Why Checking the Storage on Your Mac is Important
There is no doubt about it. It’s important to learn how to check storage on Mac. Your Mac storage is something you cannot take for granted. If you carelessly fill up your Mac, it’s going to give up on you.
One of the proper ways for you to care for your Mac is to check on its storage regularly. Yes, regularly and not when you just feel like it. Even worst, not when you’re seeing the spinning beach ball cursor that’s warning you that your Mac is running out of space.
Don’t wait for the time when the memory on your Mac is used up. Learn how to check storage on Mac now. If you don’t learn how to do it, you Mac can eventually crash. You could lose all your files instantly.
People Also Read:2021 Top Tips to System Has Run Out of Application MemoryTop 2 Ways to Remove Mac Purgeable Space [2021 Update]
Part 2. Easy Ways on How to Check Storage on Mac
It could be quite challenging to navigate a Mac to check on its storage. How to check disk space on Mac? There are options you can do to check storage on Mac with the use of an app and a widget. The other options will show you how to navigate your Mac to check on its storage.
Option #1. How to Check Storage on Mac with PowerMyMac
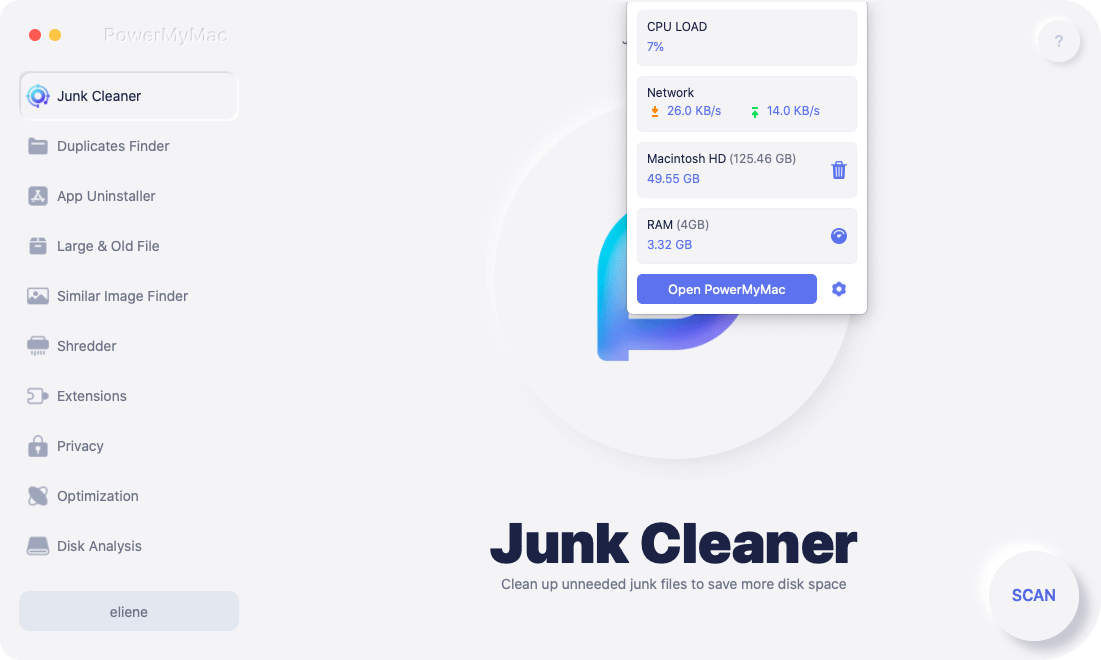
Using the PowerMyMac is probably the easiest way for you to check on storage. This is an app that requires only a few clicks to show you how much storage space you have on your Mac. Check out the simple steps below on how to use it.
- Use this link to download and install PowerMyMac from the iMyMac website.
- Launch PowerMyMac and you will see the status of your CPU, memory, and disk. That is how easy it is to use PowerMyMac to check the storage on Mac.
Even though you have a large space on the hard disk and you have installed so many applications that you have and tend to use on your Mac, the higher the possibility that you are going to quickly run out of storage space. Thus, you have to free up your space on Mac. You can make use of the PowerMyMac to remove Mac purgeable space so as to get more storage.
Option #2. How to Check Storage on Mac with iStat pro
There’s a widget called iStat pro. It will show important information on your CPU, memory, disks, network, etc. Using this widget is also a way on how to check the storage on Mac.
- Download and install the widget.
- Wait for the zip files to download. Once done, double click on the istat_pro_4.92.zip file found in your Downloads folder.
- Install the iStat Pro widget and open it. Do this by clicking on the Install button you see on the pop-up window.
- Click on the Keep button on the next pop-up window. The iStat Pro widget will now be displayed on your screen so that you can check the storage on Mac.
Option #3. How to Check Storage on Mac with Mac Disk Usage Summary
- Take your cursor to the Apple logo on the top left-hand side of the screen.
- Click on About This Mac on the drop-down menu.
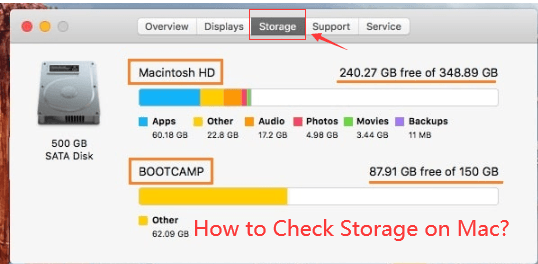
- Click on the Storage tab on the top menu of the OS X Yosemite pop-up window. You will get the Storage pop-up window where you will see an overview of the storage of your Mac. You will see how much space your apps, movies, photos, audio, and backups are taking up on your Mac.
Or you can also check storage on Mac in this way:
- When you are on your Mac's desktop, go ahead and look for the hard disk icon.
- Right-click the hard disk icon and then select "Get Info" option from the list shown on your screen.
- After that, you will then see "Capacity" of your hard drive and as well as "Available" and "Used" space.
Option #4. Navigate to the Hardware Overview folder on MacBook Pro
- Take your cursor to the Apple logo on the top left-hand side of the screen.
- Click on About This Mac on the drop-down menu.
- Click on the More Info tab on the Mac OS X pop-up window.
- Scroll down to Serial-ATA on the left panel of the Hardware Overview window. Click on Serial-ATA.
- Leave the left panel and scroll down to the bottom part of the main screen. You will see the capacity and available space of your MacBook Pro under Volumes.
Option #5. How to Check Storage on Mac with Activity Monitor
- Go to the Go tab on the top menu of your MacBook Pro.
- Select on Applications from the drop-down menu.
- Search and scroll down under Utilities in the Applications window.
- Look for Activity Monitor. You can also search the Search bar found on the top, right-hand side of the Applications window.
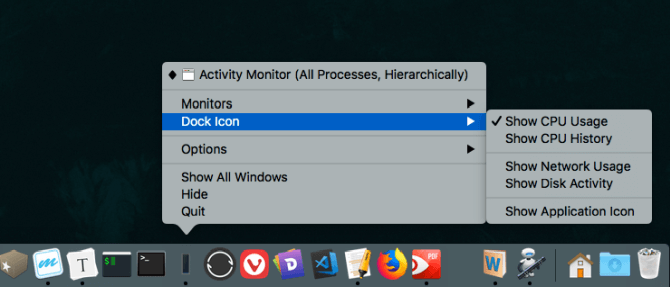
- Click on Activity Monitor. Look at the bottom part of the Activity Monitor window. You will see an overview of the storage of your CPU, System Memory, Disk Activity, Disk Usage, and Network. Just click on any of the tabs to check storage.
This part of the Activity Monitor is critical. If you click on the System Memory tab, it will show you the memory situation of your MacBook Pro. It’s not enough that you look at the free storage space. You also have to look at the Swap used.
This means that some of your unused apps are being swapped over to the hard drive of your MacBook Pro. That becomes a problem when apps are getting moved back and forth, from memory to the hard drive of your MacBook Pro. That can slow it down.
So, if the Swap used is showing a huge number, then it’s time to restart your MacBook Pro. After you restart, take a look at Swap used again and it should be back to zero.
Part 3. How to Free up Your Storage on Mac?
After checking storage on your Mac, you may find it's almost full and what you need to do is free up your storage on Mac. And you may notice that there 'Other' shows on the checking result.
What is Other on Mac Storage?
Do you know what is other on Mac storage? Be careful, it contains bunches of useless files that are eating up your disk space. These 'Other' files are including document files, temporary files, system files, browser caches, system caches, user caches, extensions, app plugins, archives, and others.
How to Clear Disk Space on Mac?
Those unneeded files in your disk space should be cleaned without hesitation. PowerMyMac not only helps you check the storage on Mac but also allows you to perform the cleanup.
You can follow the steps below to clear your disk space on Mac:
- Free download PowerMyMac from imymac.com, then install it on your Mac to launch it.
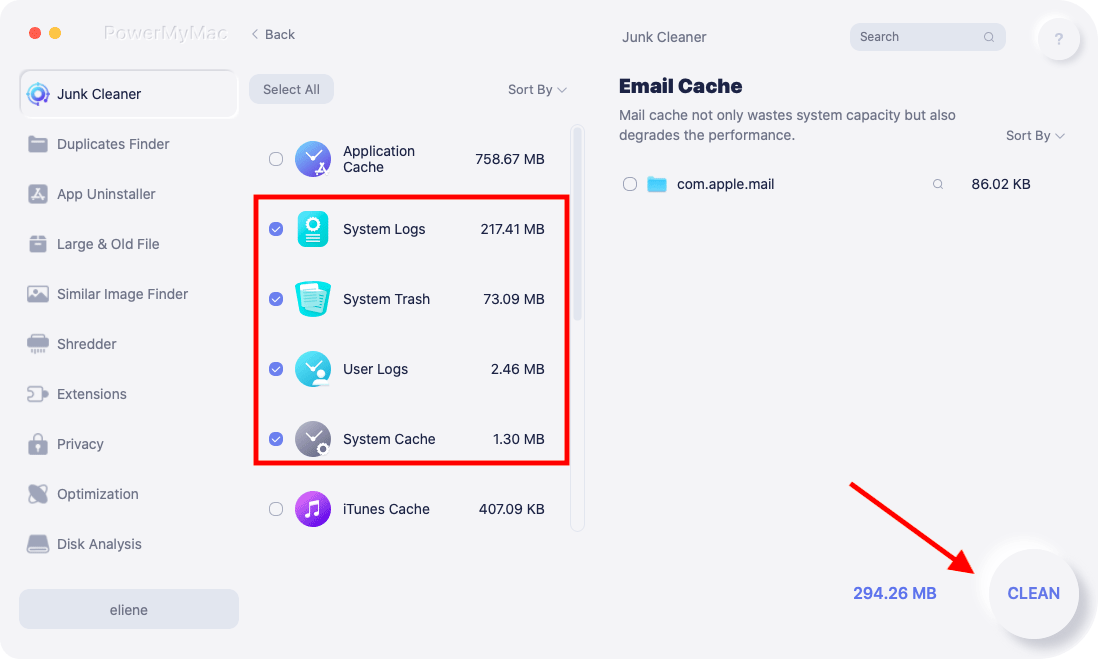
- Choose Master Scan and allow PowerMyMac to scan your Mac for junk files.
- View and select your unwanted files to clean.
- Click on the Clean button then wait for a while and the cleaning process will be completed soon.
You can also do the manual things to free up disk space on Mac one by one, but these will spend lots of time.
TIP 1. Uninstall Application That You Do not Need
Of course, all applications that you have on your Mac computer actually use up your hard disk space. Now, for you to free up space on your Mac, then why not considering deleting those applications that you do not need.
Delete Applications
- Go ahead and click on the Finder then choose the Applications in the sidebar.
- After that, go ahead and drag and drop those applications to the trash can on your Dock.
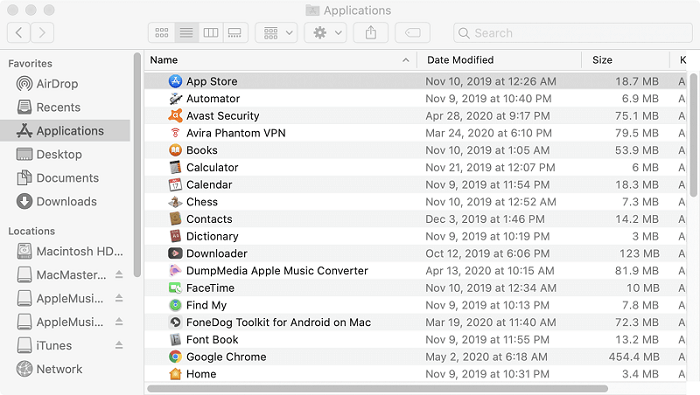
Find Which Applications are Taking a Lot of Space
- Go ahead and launch Finder window and then choose Applications.
- After that click on the "Show items in a list" icon found at the toolbar.
- Then click the size heading for you to be able to sort out all your installed application.
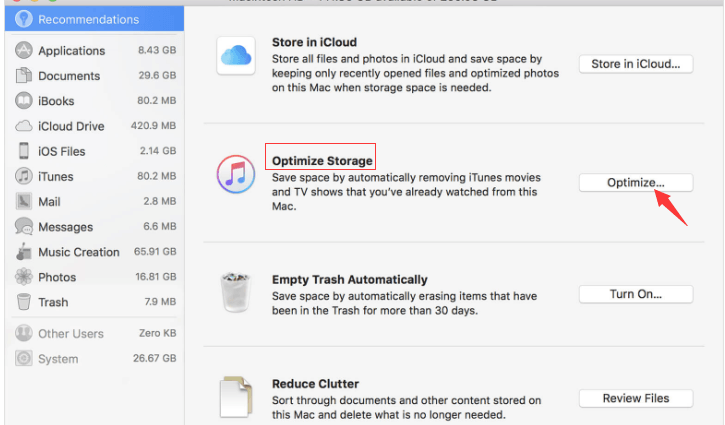
TIP 6. Manage Storage on Your Mac
Store in iCloud - This actually lets you store your documents, desktop, photos, and videos in your iCloud. After that, Apple will then free up your disk space automatically as needed.
Optimize Storage - This feature technically delete all purchased iTunes movies and TV shows after you have watched them to prevent them from cluttering on your Mac computer as this file occupies a large storage space on your disk.
Empty Trash Automatically - If you enable this feature, it will then automatically delete all old files out of your trash. These files will be deleted after they have stayed in your trash for about 30 days.
To top all the things that were mentioned above, the main key to how you can free up your disk space is to actually get your Mac computer clean like you duplicate files, junk files and more.
Part 4. In Conclusion
Now you have learned ways on how to check storage on Mac as well as useful tips to free up disk space. Having the habit of freeing up your disk space is one good idea for you to be able to save more files and applications in the future. And always remember that having an almost full dis space have the tendency to make your Mac computer slow down which we are sure that you do not want to happen.
Have you checked the storage on Mac lately? How do you usually do it? We would love to hear from you.

