


Just like any iOS devices, you too can backup your Mac. Find out how to backup your Mac in this brand new article!
Article GuidePart 1. What is Time Machine?Part 2. Clean up your Mac as a backup prelude with iMyMac PowerMyMacPart 3. How to Setup Time Machine?Part 4. How to Backup You Mac using Time MachinePart 5. How to Backup your Mac Locally?Part 6. Conclusion
People Also Read:What is Mac Purgeable Space and How to Remove Purgeable storage?2 Solutions to Delete Temporary Files.
Part 1. What is Time Machine?
Your Mac holds all the essential information you need to get through all your working days and even personal contents such as videos, photos, music and more.
Mac comes with special software called Time Machine that lets you have a copy of all the apps, software, files, and settings from Mac to an external device/drive.
In case you are searching for ways on how to backup your Mac, read this article and follow our guides!

Part 2. Clean up your Mac as a backup prelude with iMyMac PowerMyMac
Now that you are ready for the backup, we highly suggest that you perform a full cleanup on the device to ensure that you are only backing up important files and not mainly junks. To avoid the manual hassles, use iMyMac PowerMyMac.
How to Use PowerMyMac?
PowerMyMac is a Mac cleaner program by iMyMac which has a complete solution for cleaning junk files and even checks system status for CPU, Memory, and Disk.
Step 1: Download and Launch iMyMac PowerMyMac on Your Mac
Download and install PowerMyMac on Mac. Then launch it, you will see your system status on the main interface.
Step 2: Scanning to Clean
From the left side, choose Master Scan and click Scan.

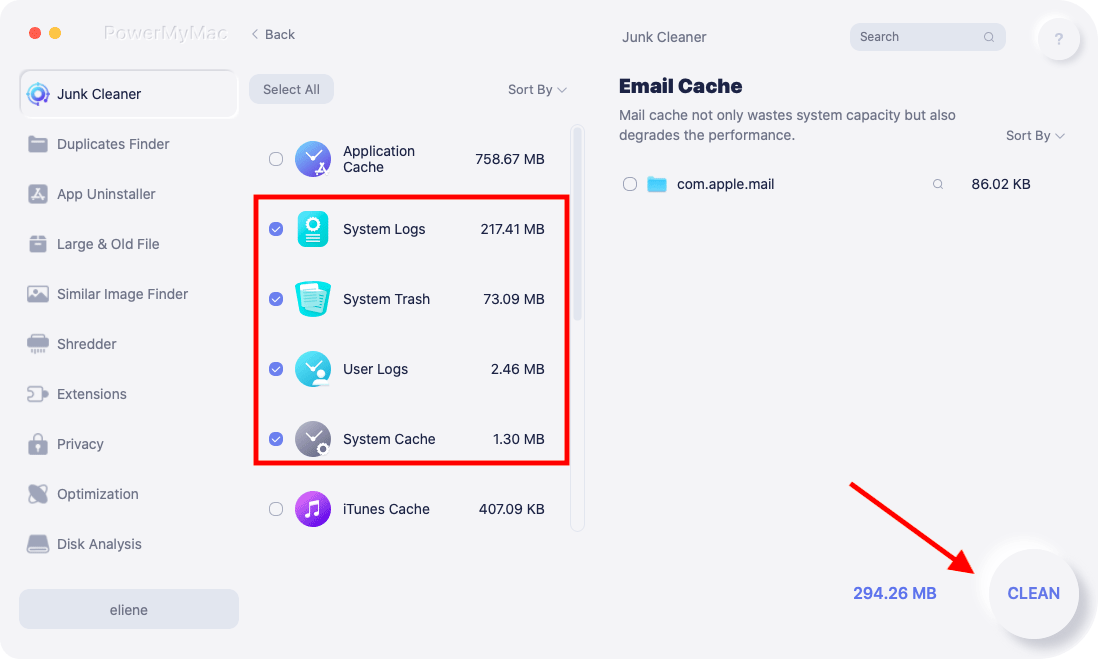
Step 3: Review and Select Junk Files to Clean Up
Wait until the entire scanning is completed. Review the scan results and look for the junk files in categories such as Application caches, junks (Photo and Mail), System Cache and logs. Click on the Clean button.

Step 4: Clean Up Mac Junk Files is Done
Cleanup is done! That’s it! PowerMyMac is so easy and simple; the fastest way to speed up the cleanup.
Part 3. How to Setup Time Machine?
To begin the backup on your Mac via Time machine, you need to first set it up by preparing any of the following:
You can use an external hard drive, or any adaptor that are compatible and can use on your Mac and or a Wireless router
Do the following:
1. Upon directly connecting the external drive to your Mac, you will be asked if you want to use the said drive to back up with Time Machine.
2. Choose the Encrypt Backup Disk and then click Use as Backup Disk. Encryption means securing it with a password to ensure that only you can access the Time Machine backup.
If Time Machine does not prompt you to select a backup disk, then follow this workaround:
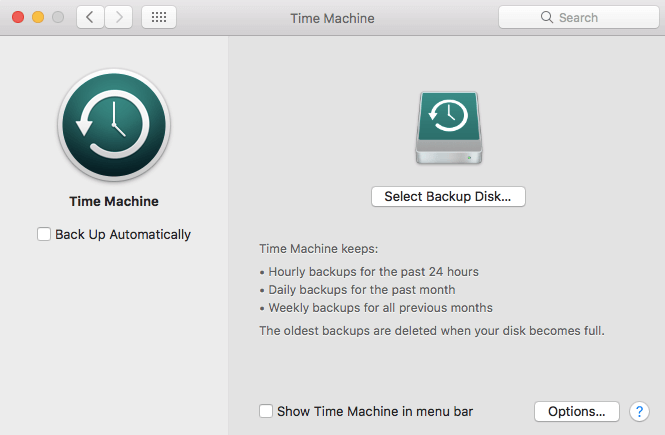
1. Open Time Machine preferences. Alternatively, you can go to the Apple menu, then click System Preferences, and click Time Machine.
2. Choose from the following options: Select Backup Disk, Select Disk, Add/Remove Backup Disk
3. Find and choose your disk among the lists, then click on Use Disk
4. If you have multiple backup disks for both personal and work files, you can repeat the said steps.
Part 4. How to Backup You Mac using Time Machine
Now that you have set up and prepared your Time Machine, you can now begin the backup process. Remember that Time Machine automatically makes backups:
hourly for past 24 hours; daily for the past month; and weekly backups for previous months.
The oldest backups are automatically deleted when the backup disk is full.
Follow these steps on how to backup your Mac:
Click Back-Up Now from the Time Machine menu if you don’t want to wait for automatic backup.
1. If you don’t want any automatic backups, you can turn it off by going to> Time Machine preferences, then deselect Back Up Automatically. You can still back up manually by choosing Back Up Now from the Time Machine menu at any time.
2. Choose Skip This Backup from the Time Machine menu to cancel a backup in progress
3. To check the backup status, use the Time Machine menu. The icon shows when the process is in progress; idle until next automatic backup, or unable to complete the backup Can't backup
4. To exclude specific items from the backup you can click the plus (+) sign and selectively choose the item/s you wish to exclude. You may find it from the Time Machine Preferences and then click on Options.
Tips:
- The very first backup will take a long time depending on the files you are saving/copying.
- You can still continue whatever you were doing while the Time Machine is backing up your data
- Time Machine will only backup the files that have been changed or added for faster future backups
Part 5. How to Backup your Mac Locally?
The fastest way on how to backup your Mac is via an external drive. Local backups are safe and highly reliable in keeping all vital information in one place. HDDs and SSDs are now affordable so you can easily choose which one works best for your needs.
Here’s how you can backup your Mac using an external drive. Remember that most external drives don’t come pre-formatted so you need to do it prior the backup. Format the drive using the Disk Utility.
1. Connect your external hard drive to Mac
2. Launch Disk Utility or go to Applications> Utilities> Disk Utility
3. Choose the hard drive you want to reformat in the Disk Utility
4. Click Erase and then Confirm
5.Rename your Hard Drive of choice
6. Choose the volume format from the following:
macOS Extended (Journaled)
macOS Extended (Journaled, Encrypted)
macOS Extended (Case-sensitive, Journaled)
macOS Extended (Case-sensitive, Journaled, Encrypted)
MS-DOS (FAT): For Windows volumes that are 32 GB or less
ExFAT: For Windows volumes that are over 32 GB
If you are not sure or unaware of which volume format to use, choose the macOS Extended for a more organized and encrypted option. It also separates each folder with upper and lower cases.
1. Open Security Options and verify if the drive is set to overwrite data at least 3 times
2. Click Erase and then confirm
Part 6. Conclusion
There you have it; you have just learned the different ways on how to back up your Mac using Time Machine and local backup. It’s now up to you which one works best according to your needs.
Of course before backing up your data, ensure you have removed junk files to lessen the backup size and you for you to be able to learn which are the files, apps, software, and documents you need to keep. For this, you need to use iMyMac PowerMyMac.
Share this post with your friends and let them know how they can back up their Macs too!

