


Google Play Music is a product of Google and it is a platform that allows you to download music, create playlists, and store thousands of songs on your account. It works like iTunes, but if it is always auto-starting, or running in the background, we will show you how to stop Google Play Music on Mac.
In this article, we will share with you the fastest and easiest way to stop Google Play Music on Mac, how to do it manually, and some tips to maintain and improve your Mac. Also, it is a software that also creates hundreds of junk files that are not necessary on your Mac and will just consume a space on your RAM that may result in your Mac’s poor performance.
Article GuidePart 1. How Do I Stop Google Play Music from Automatically Playing? Part 2. How to Stop Google Play Music on Mac Completely?Part 3. Conclusion
Part 1. How Do I Stop Google Play Music from Automatically Playing?
Does your Google Play Music keep on playing and not stopping? Or it is still showing as a running app on your notification bar? There are two ways on how to stop Google Play Music on Mac, we will first introduce the manual way to do that. And if you want to completely stop (remove) it, there is an easiest and faster way for you with the help of a third-party app which is iMyMac PowerMyMac.
There are some applications like Google Play Music that has this feature that even when you minimize it, it is still running. One of the possibilities why the music still keeps on playing is because it was designed like it and has a few glitches. This process can include more steps to follow and, more windows to visiting and it may require you to do a few works.
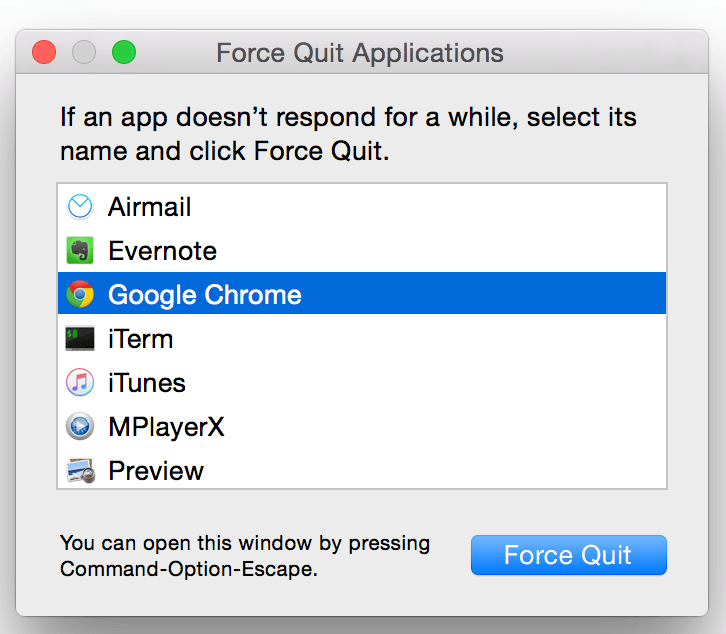
Method 1. Force Close Google Play Music
1. All together at the same time, press the buttons Options + Command + Esc or Select Force Quit on the Menu
2. Highlight Google Play Music on the Window
3. Select Force Quit
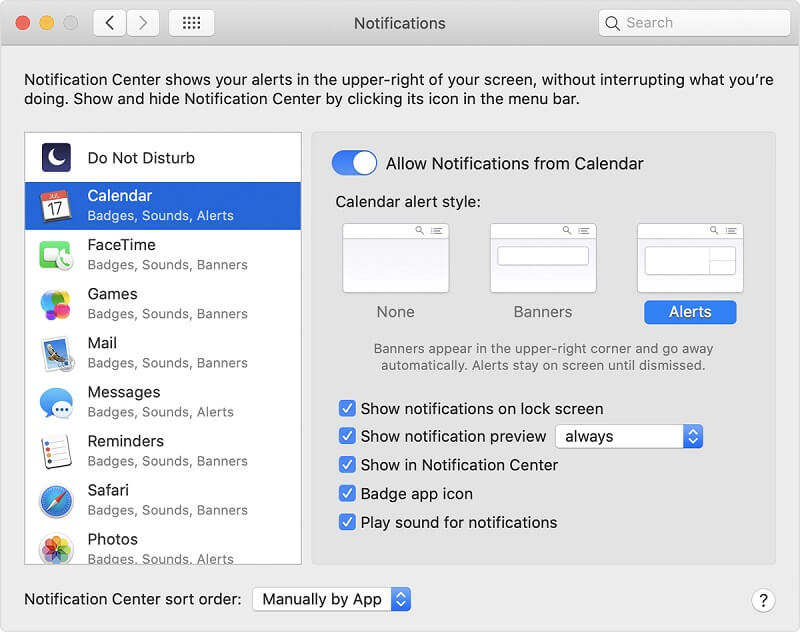
Method 2. Swipe on the Notification tool
1. Select Apple Menu > Click System Preferences > Choose Notifications
2. Highlight Google Play Music on the list of the apps > Untick the Allow Notifications on App
3. Once the options are no longer modifiable that means it was successfully turned off
Part 2. How to Stop Google Play Music on Mac Completely?
iMyMac PowerMyMac is a super tool that you could use to help you maintain the performance of your Mac, it can also serve as your assistant in getting rid of the unwanted apps and files on Mac. The great thing about it is it works faster than you have to do it by yourself, it has a built-in AI (Artificial Intelligence) that scans on your Mac automatically when commanded.
You will still get to have full control since you will be the one to design its task and you get to do some reviews and look at some previews before the execution.
· Easy to download and use, its interface is self-explanatory, and you can navigate easily
· It gives you a good review on the status of your Mac, about your storage and battery life
· Scans your Mac for files that you can delete and save space on your memory such as junk files
· Remove, delete or back up some Old and Large files, Duplicate Files and Photos that look similar
· Has a module for privacy wherein it allows you to remove browsing history on all of your active browsers, clear cache, and cookies and remove extensions that you no longer use
· The uninstaller feature it uninstalls applications like Google Play Music and removes its related files as well
· You could utilize the app up to 500MB for free and use all of its features
How to Stop Google Play Music on Mac Forever using iMyMac PowerMyMac
The steps are quick and easy to follow:
1. Using any browser go to www.imymac.com > Go to PowerMyMac > Select Free Download
2. Install and wait for it finishes> Launch the App
3. You can take a quick look on your Mac’s System Status
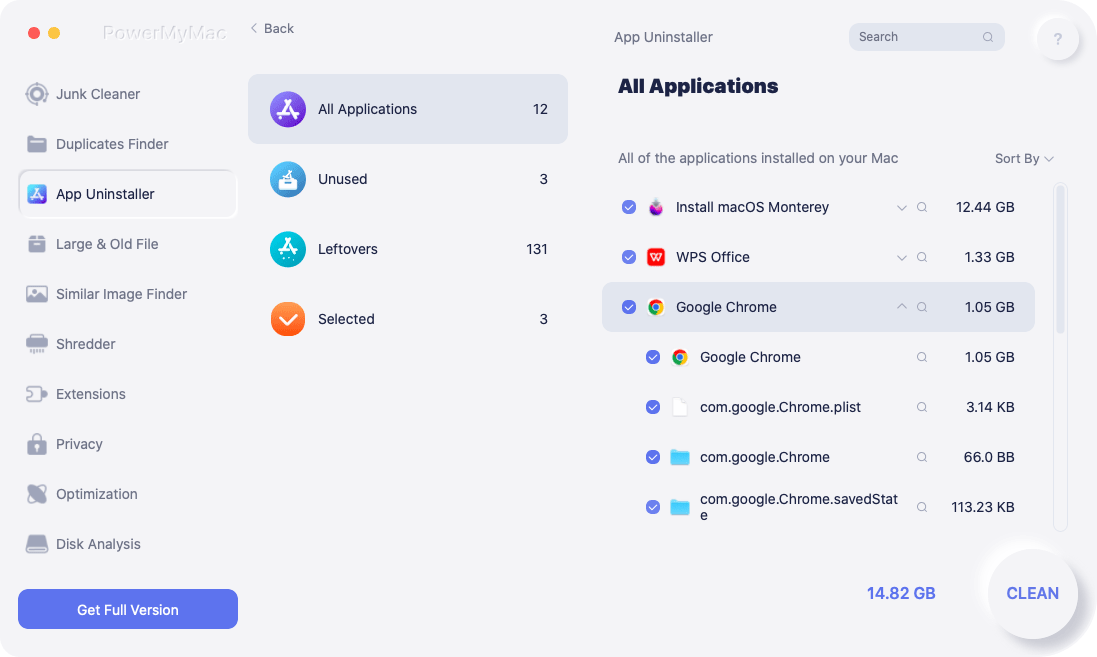
4. Click Uninstaller on the left side of the screen > Click Scan Icon > Select View
5. Look for the Google Play Music Manager on the Apps > Highlight by clicking on the radio button beside it
6. Its related files will show on the right side of the page > Click Select All at the top of the page
7. Hit Clean icon at the bottom of the screen
8. It will show you that the action was successful and will give you a report summary
Once you have followed the steps outlined above you should now then be good to go, in just a few clicks using iMyMac PowerMyMac to remove Google Play Music on your Mac.
Part 3. Conclusion
The two ways presented in this article are both effective and should answer your question on how to stop Google Play Music on Mac. The only huge difference is your convenience, by using iMyMac PowerMyMac can save you a huge amount of time and effort on accomplishing this task.
Not only it answers your question on how to stop Google Play Music on Mac but also opens a lot of windows to help you maintain and improve the performance of your Mac. Just have a free trial below to see how it works to clean up files and save more space on your Mac.

