


Many users have been slapped with an error message, “iTunes cannot read the contents of the iPhone” by Apple. Moreover, rushing to hit “OK” without examining the error message will only open a new can of worms. Remember this option on the error message will not run out of the space of your system, but wipe out your iPhone to a clean slate, which also translates to the total obliteration of data.
On Windows, Mac or iPad, iTunes throws up these errors erratically causing users to fly into a rage. We've got a wealth of insights to fix the issue and avoid reverting back to factory settings to salvage your troves of data.
Contents: Part 1. Causes of iTunes Cannot Read the Contents of the iPhonePart 2. How to Fix iTunes Cannot Read the Contents of the iPhonePart 3. Fix iTunes Could Not Connect to This iPhone on WindowsPart 4. Summing-Up
People Also Read:Top Solutions to ‘Skype Can’t Connect Mac’ Issue[Fixed] The Operation Can’t Be Completed for Item Is in Use
Part 1. Causes of iTunes Cannot Read the Contents of the iPhone
Roots of the iTunes Cannot Read the Content of the iPhone
Unfortunately, Apple hasn’t given a precise explanation of the sources of this annoying error message. The common premise shared by experts is improperly written files by third-party software. In this way, you can tool up with advanced app uninstallers to rein in rogue software.
iMyMac PowerMyMac comes with cleanup and optimization tools engineered to spark new life into your Mac with one click. It comes in handy for corrupted files on your iTunes and broken files. It developed an uninstaller with raw algorithms for deep scans to wipe out vestiges of a banished app.
Additionally, this error message has also been plaguing jailbroken iOS devices. It stems from CYDIA or its applications attempting to rectify iPhone files. A corrupted iTunes DB or iTunes CDB data also triggers this glitch.
Ensure you have connected the USB cable securely. Try restarting your computer; this could crack the code at the drop of a hat. Push your luck by trying this method first.
Fix Issue by Removing and Reinstalling iTunes
From the onset, close iTunes and unplug your gadget immediately after you encounter the error notification. Avoid hitting the “OK” button at all costs as it wipes out everything. Head for the latest iTunes update and install that version for better stability.
If you have installed the up-to-the-minute iTunes version, you need to eliminate it from your computer. Ensure you purge every trace of iTunes from your Mac using a dedicated uninstaller. Reboot your machine after installing and try to plug in iPhone again.
Part 2. How to Fix iTunes Cannot Read the Contents of the iPhone
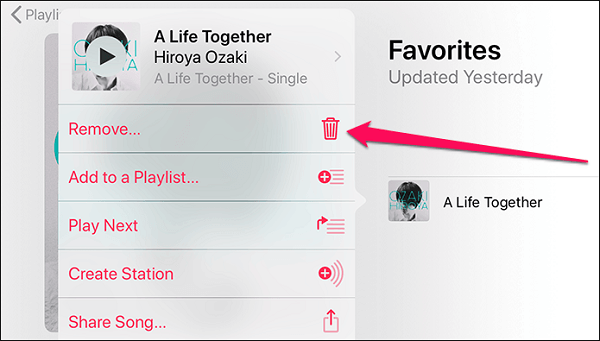
Remove Songs from Playlist
Given that the “iTunes cannot read the contents of the iPhone” error emanates from a broken database on your device, removing a song from your playlist allows you to know if it signals to overwrite of a corrupt file. Disconnect your iOS gadget from your Mac.
- Launch iTunes and highlight Playlists in the Library pull-down submenu.
- Long-press a song in your playlist, and then hit Remove.
- Next, toggle it back on, and plug it in your Mac running iTunes.
- Check if you’ve fixed the issue.
This will do the job of modifying the corrupted iTunes databank index. If you’re still deadlocked, try other procedures below.
Rename iTunes Database File
You can also force your iOS device to generate a database file again. It entails retitling the extant database with a nippy app. We recommend iFunbox as it’s at the forefront of specialized software in the field. Download and install iFunbox.
Step 1. Plug in Your iPhone to iFunbox
Plugin your iPhone and iFunbox will detect the gadget immediately. Hit My Device, and then click on Toolbox on the left pane. Select the User File System. For jailbroken devices, the system files fall under RAW File System.
Step 2. Navigate to the Folder Named iTunes Control
You should access a list of system registries. Navigate to the folder named iTunes control. Highlight the folder named Music and hit Copy to Mac to generate a backup of the music library saved on your iPhone. It allows you to retrieve it back afterward.
Step 3. Retitle the File Titled iTunes CBD
Launch the folder titled iTunes. Pinpoint the file titled iTunes CBD, and then select Rename. Retitle the file to iTunes CBDx. Close iFunbox, and then open iTunes.
Once iFunbox renames the database index, you should pull it off successfully without a fight. If you don’t have an active iCloud account or have local files, use this tool to reinstate the entire registry. Launch iFunbox, go to the iTunes Control folder, highlight and erase the Music folder.
Launch iTunes menu and hit Add Folder to Library. Pick out the Music folder you had created a backup for, and then click Select Folder. iTunes automatically organizes the contents within the registry, which is accessible via the Library area by song, album, and artist.
Simply drag and drop pre-selected files to restore back to your iPhone under the Devices parts. iTunes will start to copy items to your device right away.
Tip: If you have tried all the ways to fix the issue but it still happens, you can make use of music converter from DumpMedia to replace the way of enjoying your iTunes songs. With this tool, you can download all the songs from iTunes and listen to them offline without paying for the Premium account.
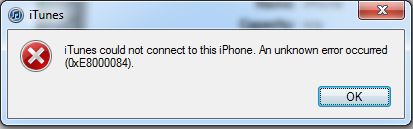
Part 3. Fix iTunes Could Not Connect to This iPhone on Windows
First try troubleshooting by updating Windows, iOS or iTunes if you restart and encounter the error against.
Deactivate Antivirus
Third-party antivirus software can often lead to connectivity problems between iTunes and your device. To confirm that, pause the antivirus tool momentarily and try plugging in your iPhone back. If that works, you should configure iTunes as an exception to the antivirus software’s firewall.
Reset Location and Privacy Settings
Restructure location and privacy settings to resolve the issue. Go to the Settings app of your device, hit General, and then hit Reset. On the sequential screen, hit Reset Location and Privacy, and then click Reset Settings as verification.
Once you’ve reset, plug in your gadget to your Mac or PC. Open iTunes, and then click Trust on the notification on your device when prompted.
Part 4. Summing-Up
Hopefully, this article has fixed the “iTunes cannot read the contents of the iPhone” error and disentangled you from a looming nightmare. Restoring your iPhone to original factory settings should only be a last resort to give your device a new lease of life. Windows users may want to check other methods circulated online.
Which method breezed you through the glitch? Did it work? Feel free to jot down a message in the comment section below.


yasin2022-11-02 19:49:22
part 1 is ok for me.. thank you so much
Thiago Campos2022-02-04 23:41:15
Part 2, Rename iTunes Database File, worked to be able to open the iPhone contents inside Finder! Thank you! Finally I can manage my iPhone using my Macbook.
Kat2021-09-10 23:14:43
Worked to get my iTunes to stop insisting it couldn't "read the contents of my iPhone...". Excellent!
iMyMac2021-09-11 06:03:40
Glad to help you!