Skype has been known to be one of the most popular ways to communicate with friends and family that is far from us. That is why most people nowadays would definitely install this on their Mac. Another reason is that Skype for Mac actually allows its users to make calls via Skype to Skype for free. And they can also call mobile numbers and landline numbers at just a low cost.
However, there are some Mac users who would want to uninstall Skype on their Mac because there are some new platforms that they can use to communicate with other people. If you don't need an app anymore, you can delete the app from your Mac to free up some space. That is why in this article, we are going to show you how to uninstall Skype on Mac effectively.
TIPS:
Contents: Part 1. What Happens When I Uninstall Skype The Wrong Way?Part 2. How Do I Completely Uninstall Skype from MacPart 3. The Manual Way of Uninstalling Skype from MacPart 4. Conclusion
Part 1. What Happens When I Uninstall Skype The Wrong Way?
Why can I not uninstall Skype for Mac? Just like all the applications on your Mac, you can choose to remove your Skype from Mac on the most common way and this is by moving the application on your Trash Bin. Easy, right? But wait, there’s more!

If you are going to uninstall Skype on Mac by just dragging it to your Trash Bin, then there is a chance that you might not be able to remove it successfully. You might meet a problem once that you decided to install it on your Mac again. Once that you reinstall the program on your Mac, it can be blocked because there are some files of Skype on your Mac.
So if you want to know how you can avoid these kinds of situation, then you can try out the methods that we are going to show you below.
Part 2. How Do I Completely Uninstall Skype from Mac
Now, if you are not that type of person has enough time in removing Skype from your Mac manually, then there is another way to do this. This is by using a third-party application delete Skype from Mac. And this is the iMyMac PowerMyMac App Uninstaller.
PowerMyMac will allow you to delete any application on your Mac that you no longer need including Skype the proper way. It will uninstall Skype on Mac completely together with all the associated files. This way, you will do all of this with just one click.
And for you to know how you can do this, here is a step by step guide that you can follow.
Step 1. Download and Install
The first thing is to have PowerMyMac installed on your Mac. You can do this by going to the website at www.imymac.com. Download the files and then once you are done, have it installed on your Mac.
Step 2. Launch the PowerMyMac Program
Launch the PowerMyMac program on your Mac. As you can see on the main interface of the program, simply choose “App Uninstaller”.
Step 3. Scan All Applications on Mac
Then, click on the “SCAN” button. From there, the scanning process will then start. Wait until the PowerMyMac completes the scanning process.
Step 4. View All Scanned Application
Once that the scanning process is complete, you will be able to see a list of all the applications that on your Mac.
Step 5. Choose the Skype Application
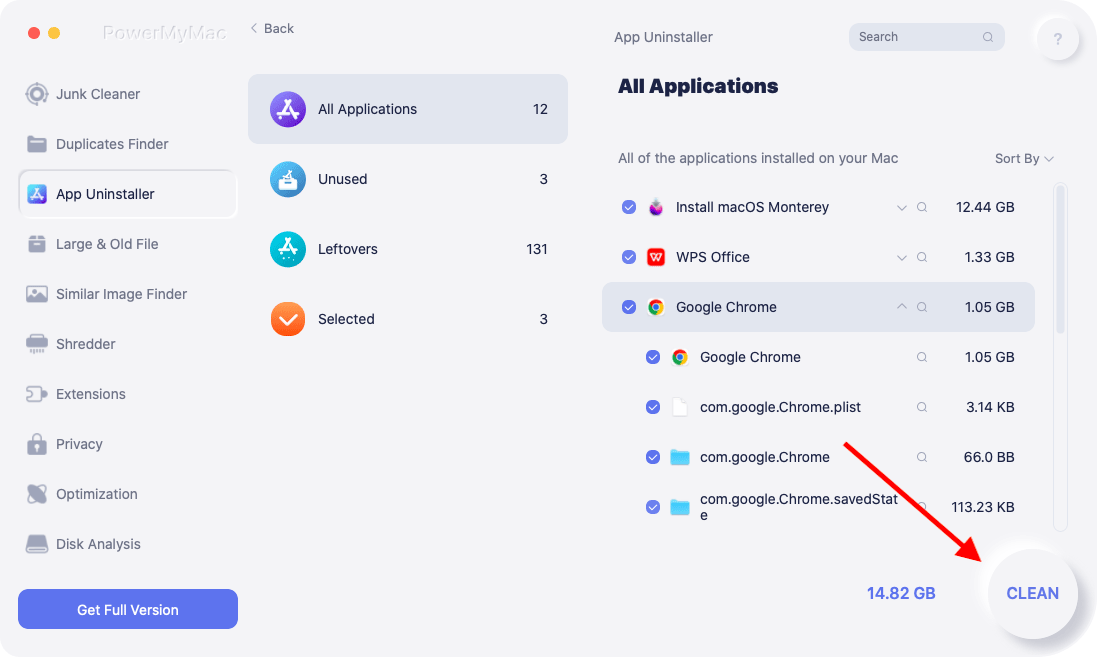
Locate “Skype” from the list. Or another easy way is by using the search bar at the top of the page.
Once that you click on the Skype application, you will then see a list of files or folders that are associated with your Skype.
Step 6. Select All the Files to Remove
Now choose all the files together with Skype by clicking on each file that you want. But if you would want to remove all the files, you can simply click on the “Select All” option.
Step 7. Clean the Application
Click on the “CLEAN” button located at the lower right corner of your screen and wait until the process is complete.

Then that is it! Once that the process to completely uninstall Skype on Mac is complete, your Skype and all the files that you have chosen will then be uninstalled on your Mac. Very easy, right?
That is how fast PowerMyMac App Uninstaller work and that you will not be needing to go through on your Mac one by one just to find and delete all the files that come with the Skype for Mac.
It is a very powerful and all-in-one Mac application to help you in optimizing and cleaning up your Mac. All it takes is just a few and simple clicks and then you will be able to free up space on your Mac, protect your privacy and speed up your Mac or your iMac.
Part 3. The Manual Way of Uninstalling Skype from Mac
You can manually uninstall Skype on Mac completely and this is one of the most effective ways of removing the program. However, doing it the manual way may take more time and effort so you have to make sure that you have enough time in doing this. But do not worry, because those time and effort that you are going to spend on this will be all worth it.
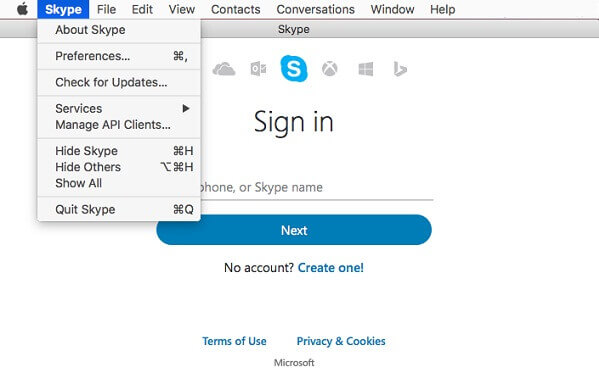
Step 1: First is that you have to stop Skype from running on your Mac. Right-click on your Skype icon located on your Dock, and choose “Quit”. You can also go straight to your Skype menu. And from there, choose “Quit Skype”.
NOTE: If it happens that your Skype won’t quit, then you can use Activity Monitor to Force Quit the application.
Step 2: Launch Finder on your Mac.
Step 3: Choose “Applications”.
Step 4: Select Skype.
Step 5: Then, Move or drag Skype to your Trash.
Step 6: Remove the files that are associated with your Skype program by going through your Library folder. All you need to do is to click on “Go” and then choose “Go To Folder”.
Step 7: Enter the following: ~/Library/Application Support
Step 8: Then, drag the Skype folder to your Trash bin as well.
People Also Read:How to Uninstall Dropbox from Mac?How to Uninstall Google Drive?
REMINDER: The files that are associated with your Skype program actually contains all of your Skype chats, as well as your call history. So if you are still in need of these data, you can skip this step.
Step 9: Then, remove Preference by going to your library and typing in the following: ~/Library/Preferences
Step 10: Move com.skype.skype.plistto your Trash Bin.
Step 11: Launch Finder once more and then type in the search bar the word “Skype”.
Step 12: Once that the result is up on your screen, delete them.
Step 13: Then lastly, go to your Trash and then empty it. Doing this will make Skype completely deleted from your Mac.
Step 14: Restart your Mac device.
Part 4. Conclusion
All of the methods that we have mentioned above will surely help you uninstall Skype on Mac completely. You can choose from doing this manually, or the fastest and easiest way. This will all depend on you. It is okay to manually uninstall any applications on your Mac.
However, if you wanted to save more of your time and avoid having trouble finding the files that you need to remove, then it is best that you use the PowerMyMac App Uninstaller. With this uninstalling tool for Mac, you will uninstall any applications completely on Mac and at the same time, remove all the related files.
And having the PowerMyMac, you will be able to maintain the speed of your Mac and remove all unwanted files, documents, or applications that you no longer need anytime that you want with simple clicks. This way, you will be able to save more of your precious time and free up space on your Mac anytime. Try the free trial of PowerMyMac now!


Darrell2018-12-11 17:23:58
thank you, nice article, just uninstalled my skype with the uninstaller, so smooth and fast, satisfied