


There are times when your Macbook Pro just needs a good reformatting.
Maybe it is running much slower than you are accustomed to, or maybe it has too many needless applications and documents cluttered all over the hard drive, or whatever reason else you may have, you need to go through some reformatting.
Look no further than this guide on how to reformat Macbook Pro.
Tips:
Article GuidePart 1. Keep up with Your Maintenance Needs (None-reformat)Part 2. Make Sure to Backup before ReformattingPart 3. How to Reformat Your Macbook ProPart 4. Final Conclusion
Part 1. Keep up with Your Maintenance Needs (None-reformat)
It’s great that you were able to reformat everything, however, you really don’t want to keep doing that, as reformatting is really more of a last option sort of choice.
Most people reformat because their Macbook Pro has gotten away from them and needs a new slate, but if you actually take some time out of your day to do some maintenance on your Macbook Pro, you may never need to reformat it again.
For easy maintenance and all your needs, we strongly suggest you use PowerMyMac. This handy little tool can help you take care of most, if not all of your maintenance needs on your Macbook Pro. PowerMyMac is equipped with a ton of great features, but to name a few, here are some of the greatest features of PowerMyMac:
Status Monitor
As soon as you start up PowerMyMac on your Macbook Pro, you will be treated to a quick, but comprehensive overview of your Macbook Pro. You will be able to see how much CPU, Memory and Disk space and usage is still available to you.
Just having that information gathered in one spot is a great and super handy thing to have, it’s like getting a better idea of what you need to do in a few short steps.

Cleaners
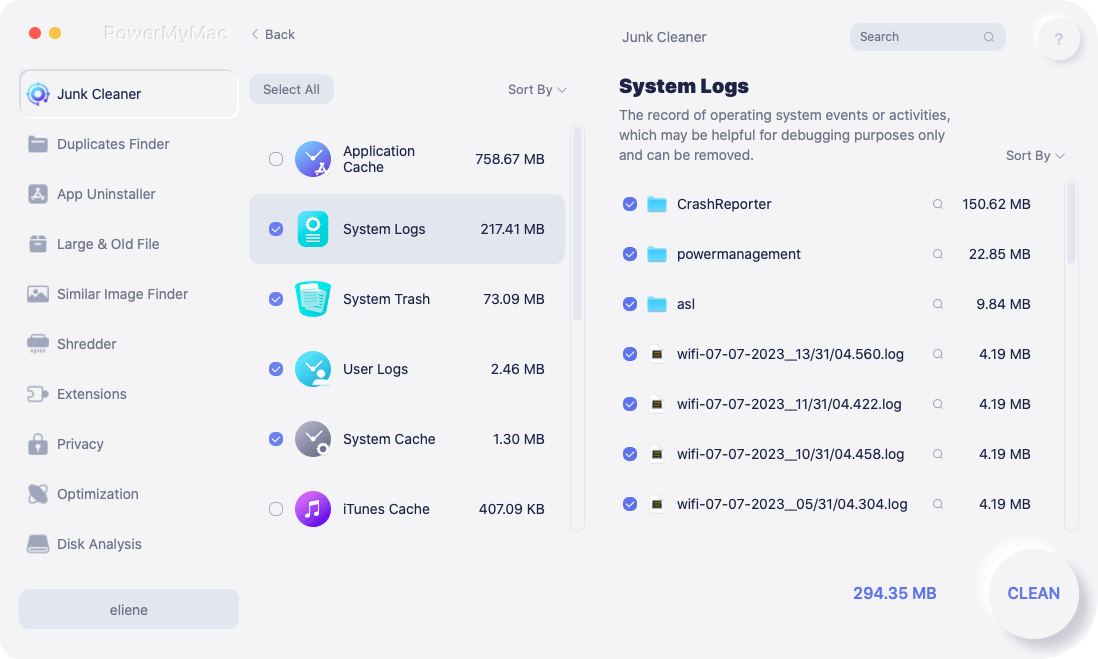
There is no such thing as maintenance without cleaning, and cleaners are your best friend when it comes to this particular need.
As you continue to use your Macbook Pro, you tend to accumulate some data and other junk files, these files take up space on your Macbook Pro, and while it can mostly be ignored, when it piles up, it can really build up to a system slowing dust bunny.
There is no real dust bunny mind you, but at the very least you now know that you need to virtually take out the trash. The Master Scan tool of PowerMyMac is known to handle all types of junk files with a few easy clicks here and there.
All you have to do is choose what type of files you want to clean up and follow the instructions on freeing space for better condition, from there you have finished taking out the virtual garbage bags.
Uninstaller
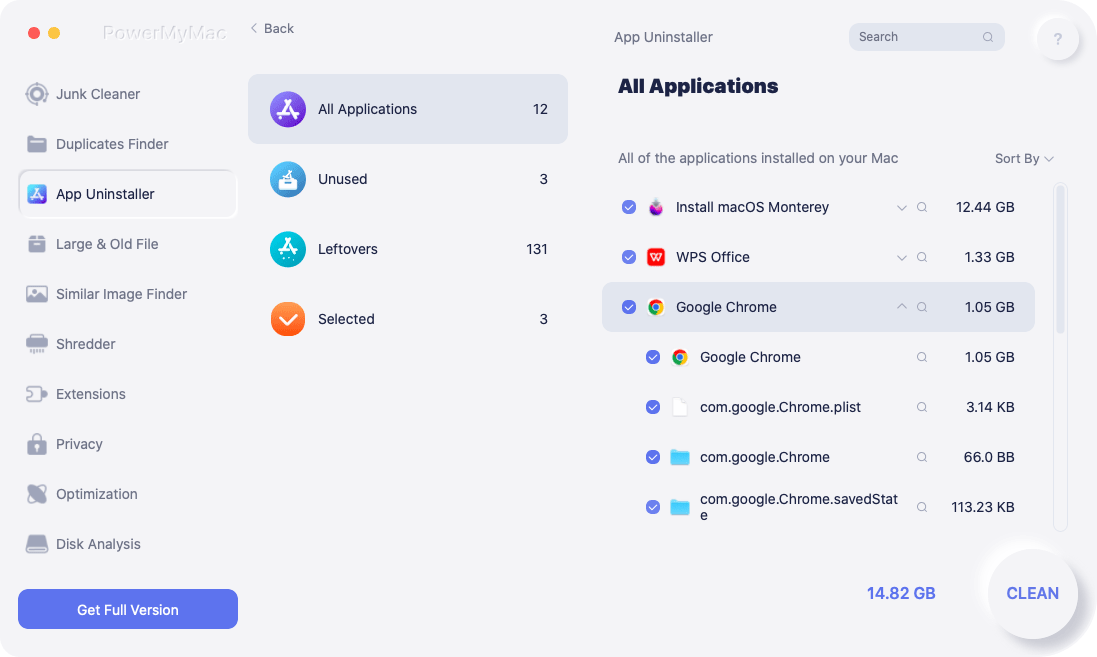
It’s great that Apple developers have made the uninstalling process quite seamless, you just have to drag an icon into the trash bin and then delete, then you are done. To be honest, while it does uninstall the program, it still leaves a lot to be desired for.
Why? When you uninstall any program or app using this method, you leave a lot of other data and information sitting on your Macbook Pro. You could manually find each file and delete it, this may take time and a bit of know-how but it should not be impossible.
Or you could make your life easier by simply using the Uninstaller of PowerMyMac, which can help you remove all files related to a program or app. Once more, just follow the steps and you can rest assured no useless information will be left on your Macbook Pro.
You will find quite a few more tools in PowerMyMac that are quite handy, but with just the three above, you can avoid reformatting more often than not.
Part 2. Make Sure to Backup before Reformatting
It is very likely that you need to keep a few files and don’t want to wipe it out completely. So before anything else, it is ideal that you start saving on an external drive or even the Cloud if you have enough space.
For programs, you may have to look for the installer again or if you still have it on your Macbook Pro, you can bring it along too.
Make sure that you back up your files on Mac very thoroughly, after reformatting there might be no other way to get your older files back.
Part 3. How to Reformat Your Macbook Pro
When you are sure that you backed everything up already, and you are ready to go about the reformatting, take these steps in order to complete the process:
- Restart your Macbook Pro - Log off everything and then restart your Macbook Pro.
- Press and hold
Command + R- As soon as you restart your Macbook Pro, press and holdCommand + R, this will boot your Macbook Pro into Recovery mode. - macOS Utilities - After a bit of time, you should be brought to a new window that is titled macOS Utilities.
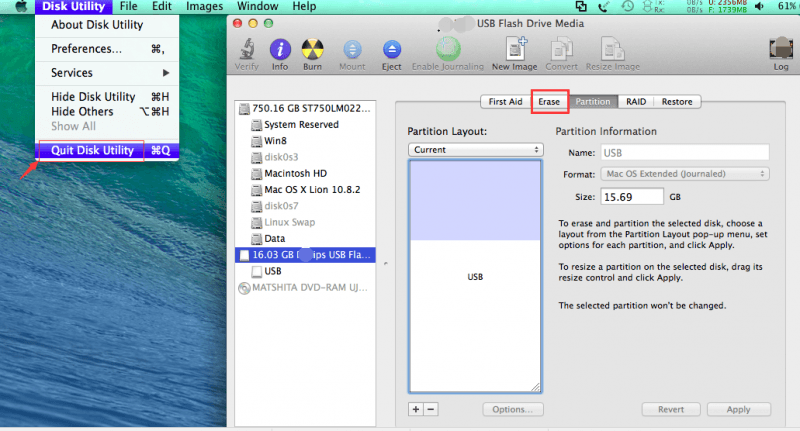
- Choose the Startup disk - You will be given a few choices, but likely your startup disk is named Macintosh HD, this is the usual default name that is given to most startup disks.
- Erase - Choose the Erase option in order to proceed.
- Enter the name for the file to erase and then click Erase once more. Please note, as warned prior, this is the point of no return, if you haven’t backed up your files yet, you can still stop the process before moving forward.
- Quit the Disk Utility - Simply choose the Quit Disk Utility option and you should just about be done.
Now that should just about complete the reformatting of your Macbook Pro, and that should be the bulk of what you need to know about how to reformat a Macbook Pro.
You just need to go about returning the files accordingly and installing some lost apps, programs and whatever else you need to get everything back into running order.
Part 4. Final Conclusion
There are times when you really need to reformat a Macbook Pro, however, this should be reserved as a last resort. After all, if you just took some time to take care of your Macbook Pro, you may never need to reformat it ever again.
And if you find that maintaining a Macbook Pro all by yourself a little too troublesome, you are always welcome to free try using iMyMac PowerMyMac to make your life easier, simpler, and more convenient.

