


A JPG file is a picture saved in a compact image format standardized by JPEG. It’s commonplace for saving digital photos or cameras to archive images. Today, JPG files dominate image types, and we always need to crop, resize, rotate or edit them. You might ask: How can I edit a JPG image on Mac?
Mac users have a wealth of built-in tools for tweaking images such as Preview. Whether you want to crop your imagery, import them into Photoshop, or adjust color and saturation, we’ve knitted together simple ways on how to edit JPG on Mac.
Interestingly, you can go at it with impunity as long as you’ve the original.
Contents: Part 1. Use Your Mac’s Preview App to Edit JPG Part 2. How to Edit JPGs on Mac Using Apple’s Photos AppPart 3. Third Party Photo EditorsPart 4. Conclusion
Part 1. Use Your Mac’s Preview App to Edit JPG
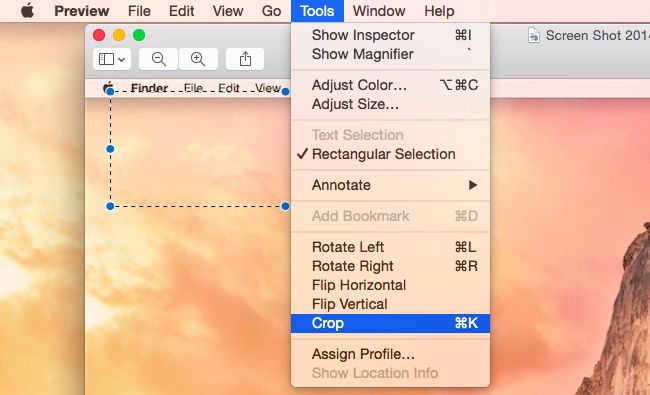
Cropping
Before you crop a photo, hive off the portion of the photo you wish to retain. You’ll need the four-sided marquee selection instrument. It’s enabled by default; all you need is to click and yank the mouse above the relevant part to highlight it.
Dart a glance at the dimensions of the hived off area at the margin of the cursor. Move with a simple click-and-drag of the marquee selection to another location. Next, click Tools> Crop to cream off the area you highlighted and retain the remainder instead, hit Edit> Invert Selection.
Resize or Rotate
Go to Tools> Adjust Size to resize your JPG. The tool window allows you to resize the JPG to different preset dimensions and chosen custom values. It also computes the image size with pre-and-post resizing readings.
The resizing instrument scales the file proportionally while resampling it by default. Once you resize settings, hit the OK button to activate the action. Onto rotation and flipping, head for the Tools menu. The primary toolbar sports a Rotate button.
Batch Resizing
Preview includes the ability to restructure multiple photos to certain dimensions. Highlight the files in Finder and drag them onto Preview Dock icon to view. The tool displays thumbnails for all highlighted files in Preview’s sidebar.
Highlight all by clicking Edit> Select All or by holding down Cmd + A. The resize tool sets similar image dimensions. Next, click the OK button in the window, Preview resizes all the files. This batch-editing trick also exports files to a common format.
Tweak Image Colors
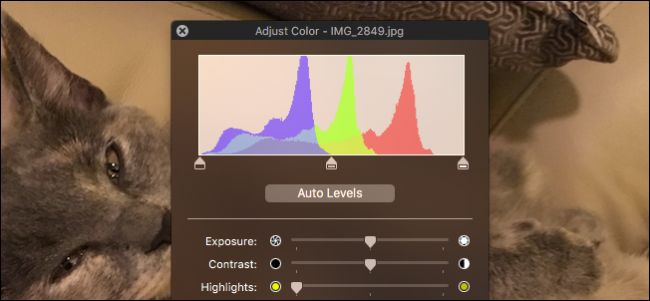
Preview boasts light and color adjustment capabilities via Tools> Adjust Color. The color instrument integrates sliders to tweak different parameters like exposure, saturation, or contrast. Wield them to sculpt Grayscale images, Sepia-toned images, and warmer or cooler-looking photos.
The shortcut to a better product is the Auto Levels button. It fixes a few common color or exposure issues.
In addition to the menu bar’s edit capabilities, invoke the Markup toolbar. It’s hidden by default and you access it by hitting the Show Markup Toolbar button on the left of the search field in the main toolbar. It supports pivotal editing actions such as Crop, Adjust Size, and Adjust Color.
Part 2. How to Edit JPGs on Mac Using Apple’s Photos App
Step 1. Adjust Brightness with Photos
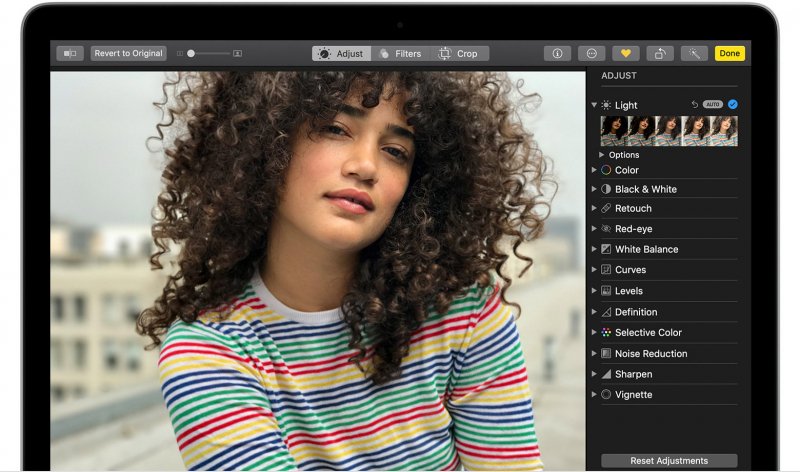
Fire up the Photos app, identify a photo to edit and double-click it. Select the Edit option on the crest of the navigation panel. Yank the Light slider left or right to tweak the luminosity.
Step 2. Adjust Color Saturation
With the Photos app open, pin down the file you’d like edit, double-click it and hit the Edit button in the upper navigation panel. Pull the Color slider to change the luminosity of the image. Hit Done on the upper right of the app’s window.
Step 3. Create Black and White Images
Open the Photos app, pick out the photo you want to edit, double-click and select the Edit feature in the upper navigation panel. Haul the Black & White slider right or left to toggle on and tweak the image’s tone.
Select Neutrals, Tone, or Grain for the black-and-white photo. Hit Done on the upper right of the app’s window.
Step 4. Adjust Sharpness
With the Photos app, zero in on the photo you wish to edit, double-click and choose the Edit option in the upper navigation panel. Select the arrow near to Sharpen on your right. Drag the slider right or left to tweak your image’s sharpness.
You’ve the option to hit Auto to command the tool to automatically sharpen the image. Choose Done on the upper right of the Photos window.
Play with the tool to get acquainted with other automatic actions like flip (mirror), rotate, straighten, and crop. For example, adjust Definition by following the steps above.
Part 3. Third Party Photo Editors
Photoshop offers the best software to improve digital photography. Remove red-eye, crop out redundant bits or sharpen hues. Others pack an incredible toolkit for state-of-the-art editing. Some of the tools have a pay-wall behind them, and thus only subscribers access them.
Look for fully-featured software with excellent editing tools and image-enhancing features to transform JPGs.
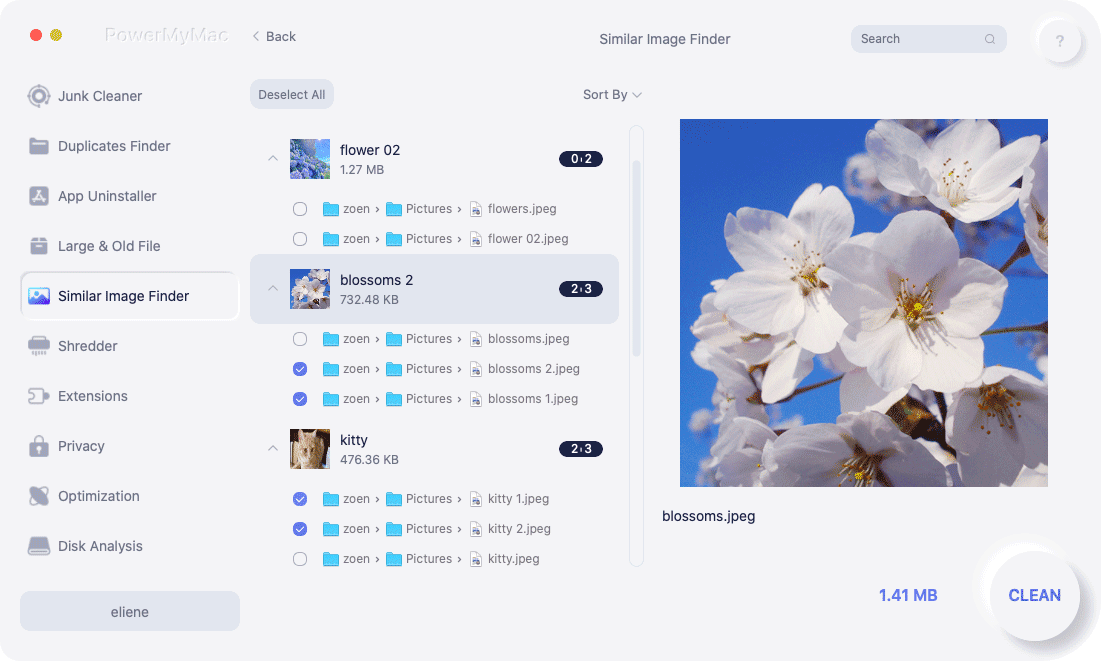
Helpful Tip: Powerful Similar Image Finder Eliminates Duplicates
Similar Image Finder from iMyMac PowerMyMac boasts up-to-the-minute reverse-photo search technology used by giant browsers for pinpoint precision. Mass duplicates eat up precious disk space making it fodder for hogged memory and stalled performance. It comes with precision-engineered algorithm and preview for safe-to-delete files.
Plodding through mass images to hunt down duplicates manually is a brain-agonizing errand. Similar Image Finder automates the process for accuracy, efficiency, and ease. Gather all duplicated JPGs like a bat out of hell to free up purgeable space and avoid the needle-in-a-haystack search.
Give it a shot if you have a vast photo library collection to sort redundant files.
Part 4. Conclusion
In all, Preview and Photos app on Mac lurk within your system as unchartered image editing gems. You’d not believe what they can accomplish without resorting to proprietary software like Photoshop. We recommend them when it comes to basic photo editing needs.
Impeccable, exquisite and subtle tweaks underscore the appealing excellence of a picture. Get acquainted with different features to have your photo-styling finesse and editing skills down to a fine art. However, professional art may require third-party software like Photoshop for advanced editing features.

