Images on your Mac are as pretty as a picture hanging from a fixture. Whether you want high-contrast illustrations for boardroom presentations or photos to share across your social network, saving images on Mac is a no-brainer. You can import pictures from a local folder, use screen capture, or simply drag-and-drop to your preferred destination.
Apple’s built-in Photos app runs a tight ship to keep your library organized and navigable while specialized editing tools broaden your repertoire. Grab a picture snapshot from a media file with your video player in a click.
Today’s article imparts exquisite ways on how to save an image on Mac without scrambling.
Contents: Part 1. How to Save an Image Manually on Your Mac?Part 2. How to Copy a Picture from a Website on Mac?Part 3. Other Options to Save Images on MacPart 4. Final Thoughts
Part 1. How to Save an Image Manually on Your Mac?
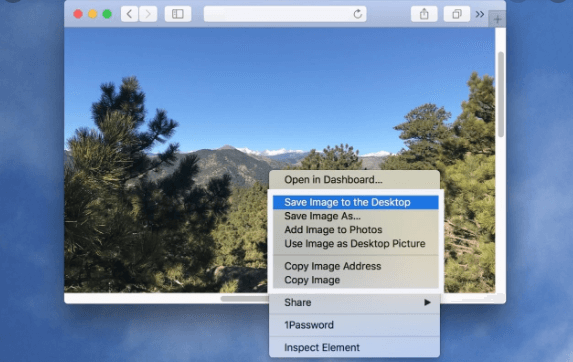
Right-Click to Save Image
Right-clicking to save an image gives you leverage to manipulate files. For a trackpad, use two fingers to tap it and if your mouse lacks a distinct right-click, press the Control key to activate it.
- Right-click on the picture, and then hit “Save Image As” in the dropdown menu.
- Type the file title or name for the highlighted image, and determine the destination of the saved item.
- Hit the blue “Save” button.

Drag-and-Drop to Save Image
Drag-and-drop offers the fastest way to save a file on a Mac with limited control than right-clicking because you can’t rename it. If this feature does not work, try to restart the Finder. Just hit Command+Option+Esc to throw up the “Force Quit” menu.
- Left-click and latch onto the image you want to save.
- Drag it to your desired location like the desktop, folder or launch documents.
- When a green orb with a “+” icon pops up, release the photo to store it into its new destination.
Part 2. How to Copy a Picture from a Website on Mac?
A vast majority of images nestled in Web servers exist as separate files that your browser command can store in your Mac. Others like those embedded in animation files or slideshows don’t exist as isolated images on a server. To extract these pictures, a screen capture comes in handy.
The built-in Macintosh Grab utility in OS X allows you to capture screen images. Alternatively, invoke a keyboard shortcut command to get the job done.
Use a Browser to Copy the Image
- Head for the web page with the image you wish to copy.
- Right-click the picture and choose “Save Image As” in the prompt menu. If the “Save” option does not show up, go for the screen capture technique to import it.
- Rename the image file using the “Save As” dialog box and hit “Save” to download it to your Mac.
Alternatively, latch onto right-click for the “open image in new tab” option and drag the image to a folder on your Mac. Grab the image and yank it where you want it.
Use Screen Capture Tool to Copy the Image
- Open the website with the image you wish to copy.
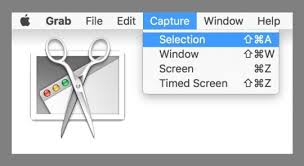
- Launch the Grab application via the Utilities folder in the Macintosh Applications folder.
- Choose “Selection” in the “Capture” menu. Mark the photo you wish to copy by hitting and yanking a rectangle enfolding it with your mouse. The imported photo should appear in a fresh, unnamed Grab window.
- Choose “Save” in the Grab File menu to copy the picture to your computer. TIFF acts as the default file format for these files.

Tips:
Use keyboard shortcuts to grab screenshots on the Macintosh. Hold down “Shift+Command+3” to capture a screenshot of the entire Macintosh display. For a partial result, hold down “Shift+Command+4” and crop a portion of the screen to capture.
The Preview feature in the Macintosh Applications allows you to change the Grab TIFF file you imported to JPG or PNG. Preview also supports screenshot capture akin to Grab. The option “Take Screen Shot” appears in the “File” menu with choices for “Entire Screen”, “Selection” or “Window”.
Part 3. Other Options to Save Images on Mac
Use Video Player to Capture Snapshot
Video players incorporate a feature to capture a snapshot on Mac. Play the media file and pause to zero in the frame you wish to capture. You can extract a still from a QuickTime video with the OS X screen capture utility or Command+Shift+3 to create a screenshot that migrates to your Desktop.
Via Screenshot Apps
Download proprietary screenshot apps with rich tools for editing and photo management for professional-grade output. There’re many powerful image annotation apps that come with all bells and whistles you won’t find in Grab or QuickTime apps.
Copy & Paste
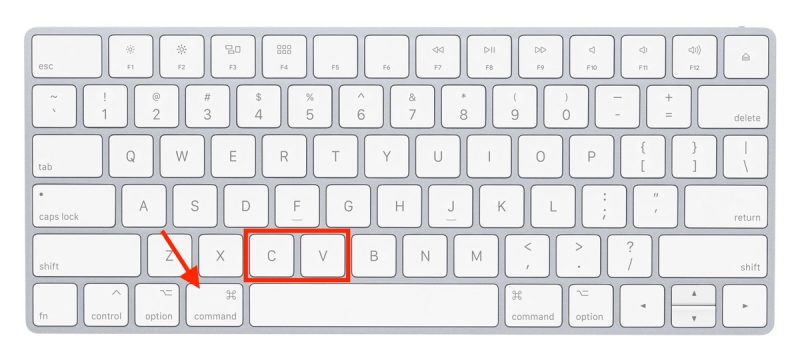
Lastly, to copy and paste photos, highlight the file while pressing command+c along with command+v. Also, right-click the region you wish to paste the image, and then choose paste.

Tip: Similar Image Finder-Purge Redundant Images
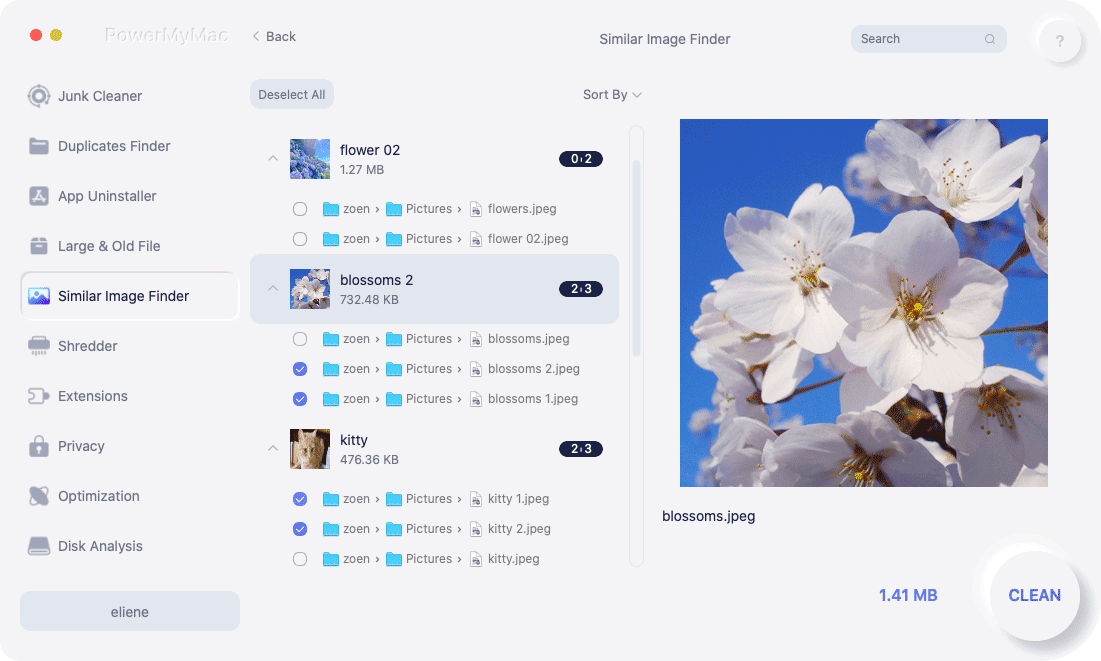
Reverse image technology takes a file as an input query and computes results affiliated with the item. iMyMac PowerMyMac’s Similar Image Finder incorporates reverse image search capacity to farm out similar images with mathematical precision.
Try this nifty tool to range over labyrinth photo folders to pinpoint and wipe away similar images on your Mac in a trice. You can also use its Duplicates Finder to delete the same photos.

It can sift through your system to expose replicated contents so you can delete them effortlessly. It’s a must-have for photo enthusiasts with tons of images. Salvage wasted disk space on your SSD, SSD, or Cloud to optimize your Mac by flushing away duplicates. It’s a dynamic app equipped with intelligent technology to home in duplicate or similar images.
Part 4. Final Thoughts
We’ve explored simple ways commonplace in Macs on how to save an image on Mac without breaking a sweat. The method you choose depends on the source of your photo such as a website. With keyboard shortcuts at hand, everything can be done by a nod and a wink. Apple’s pre-installed tools allow you to generate image files without the swings and roundabouts of third-party software.
However, advanced editing features omitted by native applications make proprietary tools like PhotoShop a necessary evil. They also convert images into JPG, GIF, PSD, and other formats. Other methods include downloading an image from email or importing from an external storage-but this is commonsense.


