


If you are one of those people who either have online jobs or do office work, then we’re sure you tend to scan your documents at times to save them in your Mac. Then you’ve also heard of Scansnap, right? What if you encountered problems with scanning while on time-consuming work? And fed up with the tool for the recurring trouble it has caused, you chose to just uninstall Scansnap on Mac?
Maybe you’ve even found a better scanner tool to replace it. That’s why, in this article, we will teach you an easy way to uninstall the apps on Mac both manually and using an application uninstaller.
Contents: Part 1. What is Scansnap?Part 2. Quickly and Completely Uninstall Scansnap on MacPart 3. Manually Uninstall Scansnap on Mac: Steps to FollowPart 4. Conclusion
Part 1. What is Scansnap?
There are many types of scanners the world has been using to create a soft copy of their documents. You can even use a simple printer if it has a scanning feature. But today, we will talk about Scansnap, its features, and why there is a need to uninstall Scansnap on Mac.
As many have known, Scansnap is a tool that can do many things; scan your documents, adjust the necessary settings, correct files, and even the scanned data is recognized afterward and classified. With your frequently used preferences, it also lets you create a profile to further enhance efficiency. You can even turn Scansnap off manually if you’re not using it or it will just automatically turn itself off if not used after 4 hours.

Sometimes Scansnap creates problems. Still, people have been searching for an alternative due to it being pricey. Even those that have it will switch to a much lower cost alternative because of scanning just a few documents than normal or not being compatible with a certain version of Mac.
So, in the end, they just choose to uninstall Scansnap on Mac and look for a scanner that will suit their needs. It may not be as fancy as the Scansnap but they still get the job done.
Part 2. Quickly and Completely Uninstall Scansnap on Mac
The most important thing on our minds when we delete Scansnap on Mac is how much space it would free up our drive. There is a tool, however, that will let you make sure that all data has been deleted from that app and that is, the iMyMac PowerMyMac.
Using the PowerMyMac, you can save time going through folders one by one just to find hidden data from the Scansnap app as the tool lets you completely uninstall the app and at the same time remove the remaining data.
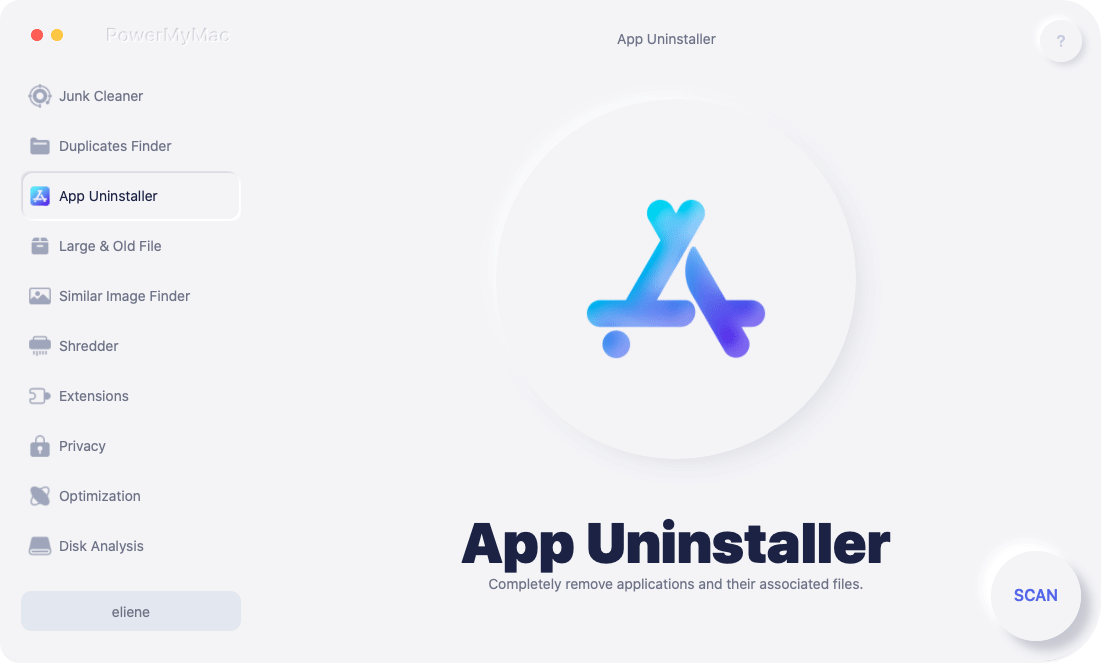
To quickly and completely uninstall Scansnap on Mac, simple instructions are provided below:
- Search for the App Uninstaller, click it, and after that, press SCAN to start scanning the apps currently installed.
- After scanning is done, on the left side of the tool, a list of categories will be displayed. Look for All Applications to locate the app or simply go to the search box in the upper right corner and type its name.
- Seek out the app you want to uninstall, tick it, and then press the CLEAN
- A pop-up window will then appear that says “Cleaned Completed”, showing how many files are erased and what your available disk space is on the drive now.
PowerMyMac is a great tool to use when uninstalling apps as it also lets you optimize your Mac afterward for that lag-free experience everyone wants. So, to uninstall Scansnap on Mac, this is the best friend you’ve been looking for. You can also try it for free to remove other apps like Adobe CC or to delete the junk files on Mac.

Part 3. Manually Uninstall Scansnap on Mac: Steps to Follow
A lot may still be confused on how to properly use an app uninstaller so why not do it manually? To completely remove Scansnap from Mac, it can also be done manually, of course since most people won’t bother with downloading an app, especially if they’re in a hurry.
But do take note that before uninstalling it, you will need to deactivate the license for Scansnap home. After doing so, a list of instructions is provided below to manually uninstall Scansnap on Mac:
- Click the Sign out button to deactivate the license for ScanSnap first
- Exit ScanSnap Home
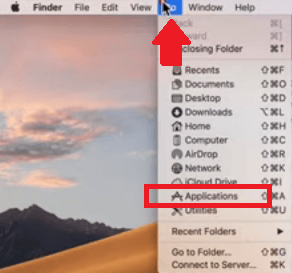
- From the Finder, select Applications → ScanSnap Home, and drag the folder into the Trash
- Empty the Trash
- Now in the Finder, select Applications → ScanSnap Online Update → Sub → AOUUninstaller
- On the window of ScanSnap Online Update Uninstaller, click the Continue button
- Click Uninstall
Now the uninstallation of ScanSnap Home/Manager and ScanSnap Online Update is complete.
Part 4. Conclusion
Scansnap is a great software to use if you’re dealing with dozens or more documents a month to scan but is very costly if you’re not even scanning thrice per week. If your workflow has changed but still has the app, it’s better to uninstall Scansnap on Mac and switch to an alternative.
PowerMyMac is a great example of a tool to use if you plan to uninstall it as it has many great features and even lets you optimize your Mac for a lag-free experience. So, what are you waiting for? Download and install it now!

