


A common issue of concern during file transfer between computers using a disk is associated with the disk format. Generally, this file compatibility issue can be remedied by using any of the NTFS for Mac free tools.
If you are using the Mac OS and you plug in a disk, the computer can read the disk but you are limited since you cannot write anything or save any files. Generally, this is a cross-platform compatibility issue that manifests when the disk you are using was previously formatted using a Windows OS.
To fully understand this predicament, you should take a close look first on file systems. A file system is a method on how an operating system organizes and stores files on drives as well as specifies which information can be attached on files such as filenames, permissions, and attributes.
As an example, Windows saves, stores and setups any external hard disk or flash drive utilizing its default format – NTFS (New Technology File System). The main concern is, while Apple can support NTFS and other Windows formats, the “write” capability to NTFS drives has been inactivated in OS X. It simply means that if you are using a Mac OS and a disk drive that is Windows-formatted, you cannot save on the drive or modify any existing files there.
Contents: A Close Look on NTFSFormat Your Drives in FAT Dealing with the Format Compatibility Quick Tip on Using the NTFS Tool by PowerMyMacLet's Wrap It up
People Also Read:How to Delete System Log Files on MacHow to Check and Free Disk Space on Mac
A Close Look on NTFS
NTFS or “New Technology File System” is a type of file system that the Windows NT operating system utilizes for storing and retrieving files on a hard disk. The difference with NTFS is that it provides several improvements over FAT and HPFS when it comes to security, performance, and extensibility.
Once a hard disk is being formatted, it is separated into partitions of the entire hard disk space. In every partition or segment, the operating system monitors all the stored files. Every file is stored on the hard disk in one or several clusters that have a set size.
When NTFS is used, the sizes of these clusters vary from 512 bytes to 64 kilobytes. Generally, the bigger the hard disk, the larger the default size of the cluster. It is believed that a system user might decide to increase performance at the cost of some space inefficiency.
Format Your Drives in FAT
A simple way to deal with this format-related compatibility issue is to reformat your drive into FAT (File Allocation Table). This is an older file system created by Windows and has full read and write compatibility with OS X.
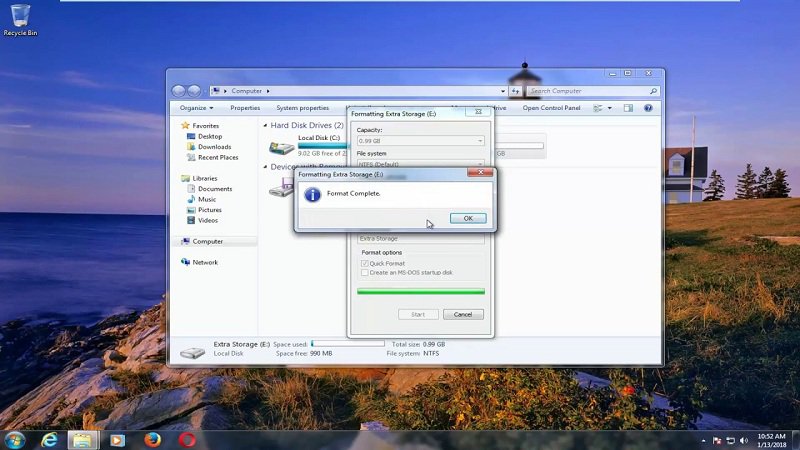
Evidently, NTFS possesses several benefits as a format. Generally, it is a newer variant and verified to function rapidly than its FAT-formatted equals. Can macOS format NTFS? In case your drive is new and you do not have any files in your drives, it is recommended to reformat and convert your drive to FAT.
There are instances though where this is not the ideal solution such as:
- If data has been written on the drive that has not yet been backed up. If you decide to reformat the drive to FAT format, it will erase all the data saved on it.
- If there is a need to transfer files that are larger than 4GB in a single go. Remember that FAT only allows file transfers with the maximum size of 4GB and below.
In case these instances are not your concerns and you want to make a transfer between your computers with different operating systems an easy task, reformatting your drive is the best solution.
Dealing with the Format Compatibility
The macOS of Apple is capable of reading from Windows-formatted NTFS drives but cannot write on them.
There are a few solutions that will allow full read/write access to NTFS drives.
Is NTFS for Mac necessary? It might be useful if you want to write to a Boot Camp partition on your Mac since Windows system partitions must utilize the NTFS file system. Nevertheless, for external drives, it is recommended to use exFAT. The macOS is capable of reading and writing on the exFAT drives like Windows.
Is NTFS for Mac free? You have several options for this, simply choose one that suits your needs:
- Paid third-party drivers. You can find a wide selection of third-party NTFS drivers for Mac that you have the option to install and works efficiently. Although these are options are bought online, one must offer better performance than the free solutions.
- Free third-party drivers. There are free and open-source NTFS for Mac free that you can install on your Mac to allow write support.
Quick Tip on Using the NTFS Tool by PowerMyMac
On the Toolkit module of iMyMac PowerMyMac, you will find a solution for the file incompatibility issue. Generally, NTFS is one of the main file systems of Windows. In case you are using a Mac and need to read or write files from SSD, HDD, or a flash drive that has been formatted under Windows, this tool by PowerMyMac will surely come in handy.
Tip: The current version does not support the following function temporarily, but a special software that supports the following function will be released in the future.
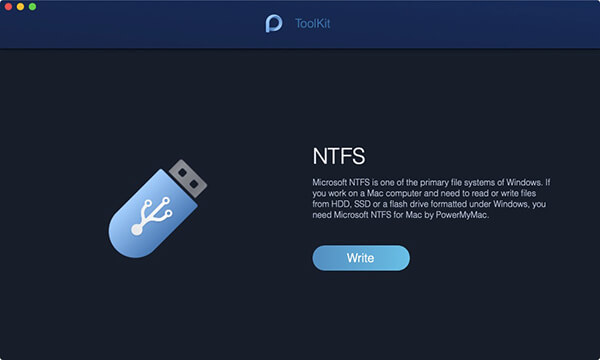
Step 1. On the Toolkit module of PowerMyMac, select the NTFS tool.
Step 2. On the home page of NTFS, tap on the “Write” button to start to copy, edit, delete or initiate other instructions on your files from SSD, HDD or a flash drive formatted under Windows on your Mac. In case a pop-up window stating “Fail” appears, you must install NTFS – 3G as well as Osxfuse prior to using the NTFS tool.
Step 3. At this point, you will see the USB information on the left side while the files and folders in the USB are on the right column. Drag one of your files from your USB to the upper blank site.
Step 4. Tap on the “Write” button and the file that you have chosen will be stored in your USB. Once the chosen file disappears in the site or a message appears, it indicates that the writing process is complete. Furthermore, the USB icon appears different earlier when it was plugged into your Mac. It is also a sign that you are successful in writing.
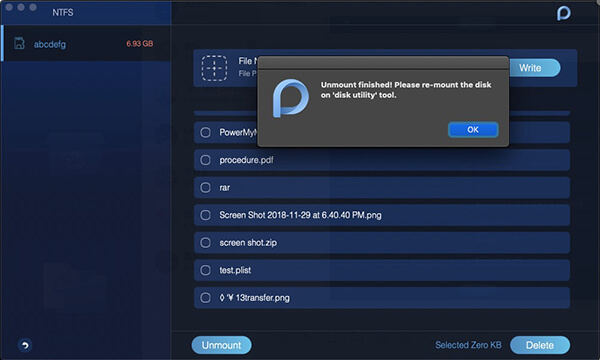
Step 5. Once the writing process is completed, tap on the “Unmount” button to remove your USB from your Mac.
Let's Wrap It up
If you want an easy and straightforward manner to handle the file incompatibility issue, this NTFS for Mac free tool by PowerMyMac is a recommended choice. With it, you can easily use NTFS on Mac.
Simply follow the steps on using this tool if you are using Mac and if there is a necessity to read or write files from SSD, HDD, or a flash drive that has been formatted on Windows.

